


2015
nov.
25
Cavius Maximus eng
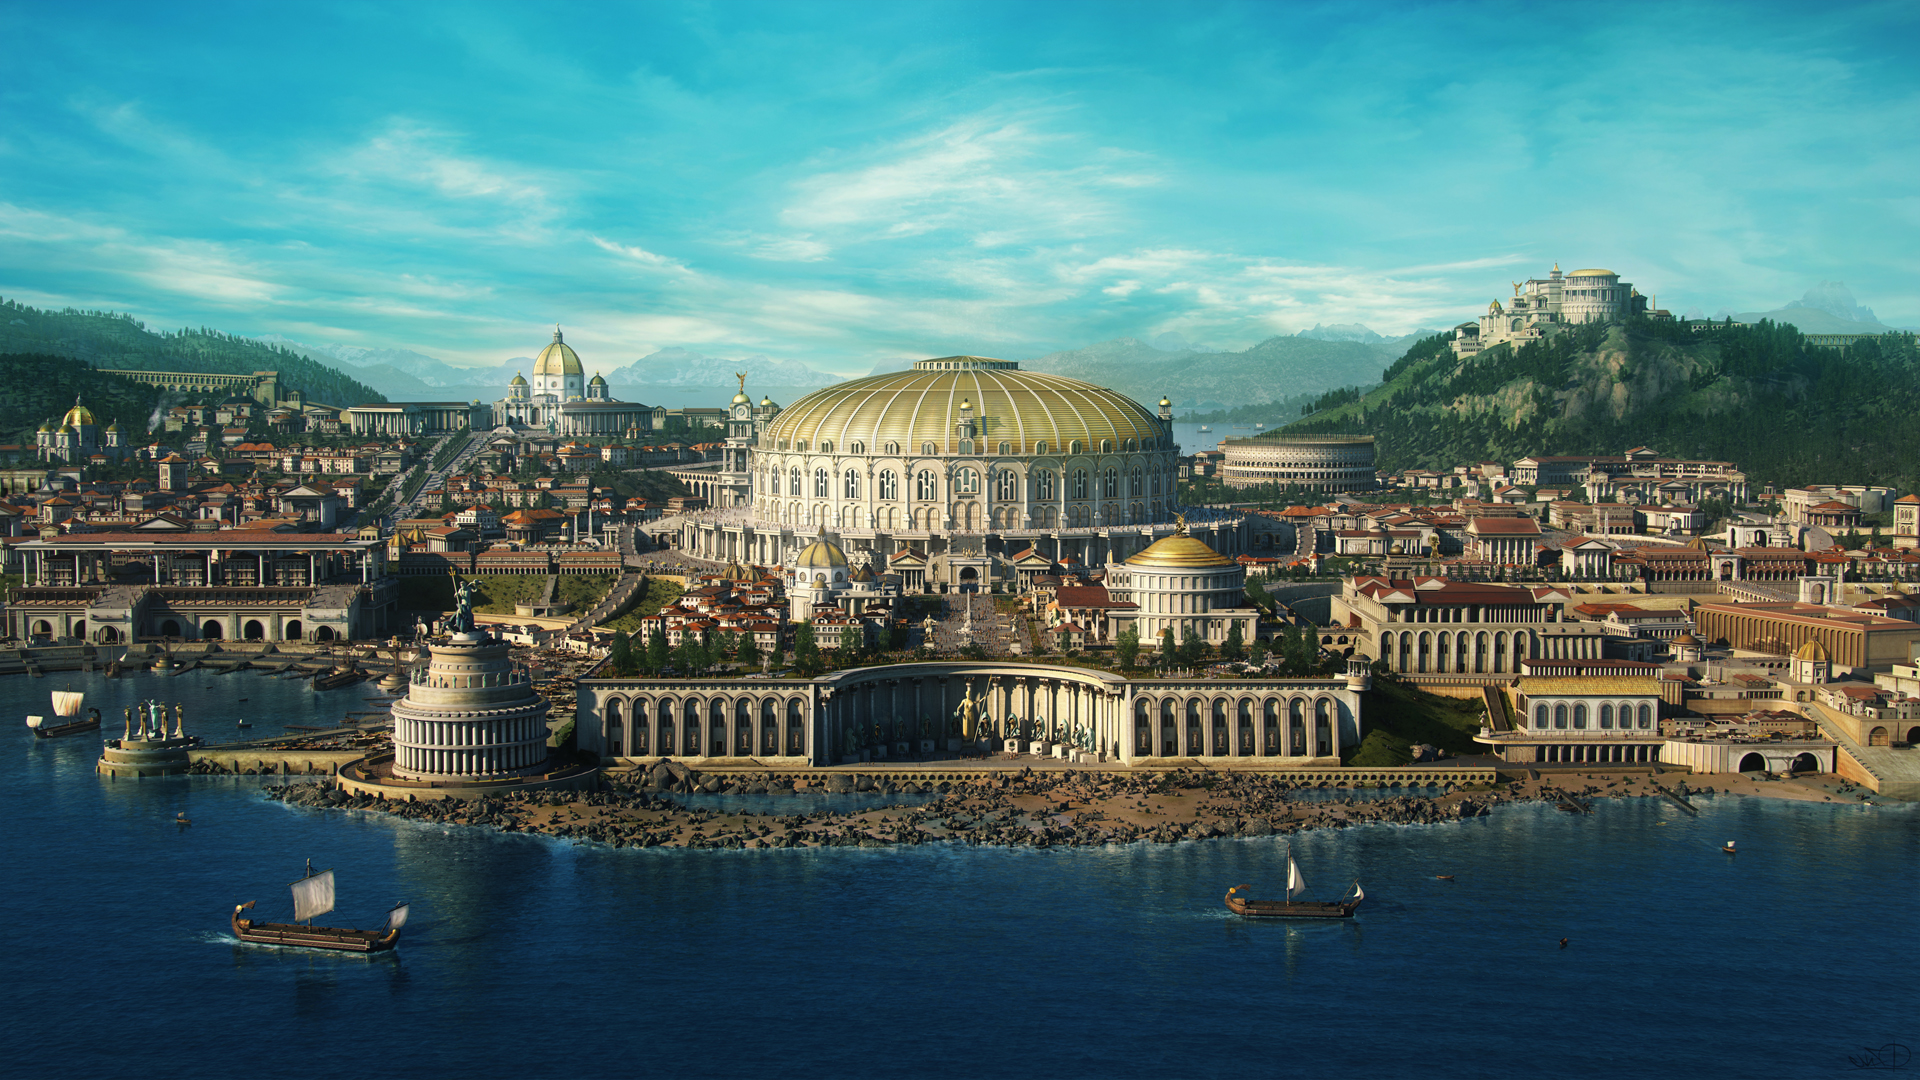
My latest artwork, for higher resolution go check out the 6K image:
https://www.dropbox.com/s/6fhrgzwm7hso5g8/caviusmaximus_6k.jpg?dl=0
The progress video: "the making of Cavius Maximus"
And the detailed making of right after the next button:
So, let's get started:
Last year we went out for a northern Italy tour, with Roxy and this year we visited Rome. (we still have to do our southern Italy tour :) ) Rome is amazing, you ever been there you know. In one of the curches i saw an extremely beautifuly wooden sculture ( well... maybe not sculpture, but just call it that way.) anyway, my mind/vision started to roll and i had enough inspiration to do something different besides my daily work and my Starcraft fan movie. Liz took away my energy till the end of october :/
So i had the plans, but i didn't make any concepts, all i wanted to create something huge and monumental. The rest was blurry. I never thought that i will make a whole city with this incredible amount of... stuff. ( just the usual :D )
So, the first steps: I knew that i will need a huge building into the middle of the scene,but... eheh that's all. I really didn't had any specific plans, but i tried to image what and hoow would i build a city. And right after i started putting down the basics, i gained speed and switched to 5th gear.
First steps: blocking; dome in the middle, cubes as temples, another cylinder for an arena, another block for a clocktower, etc etc: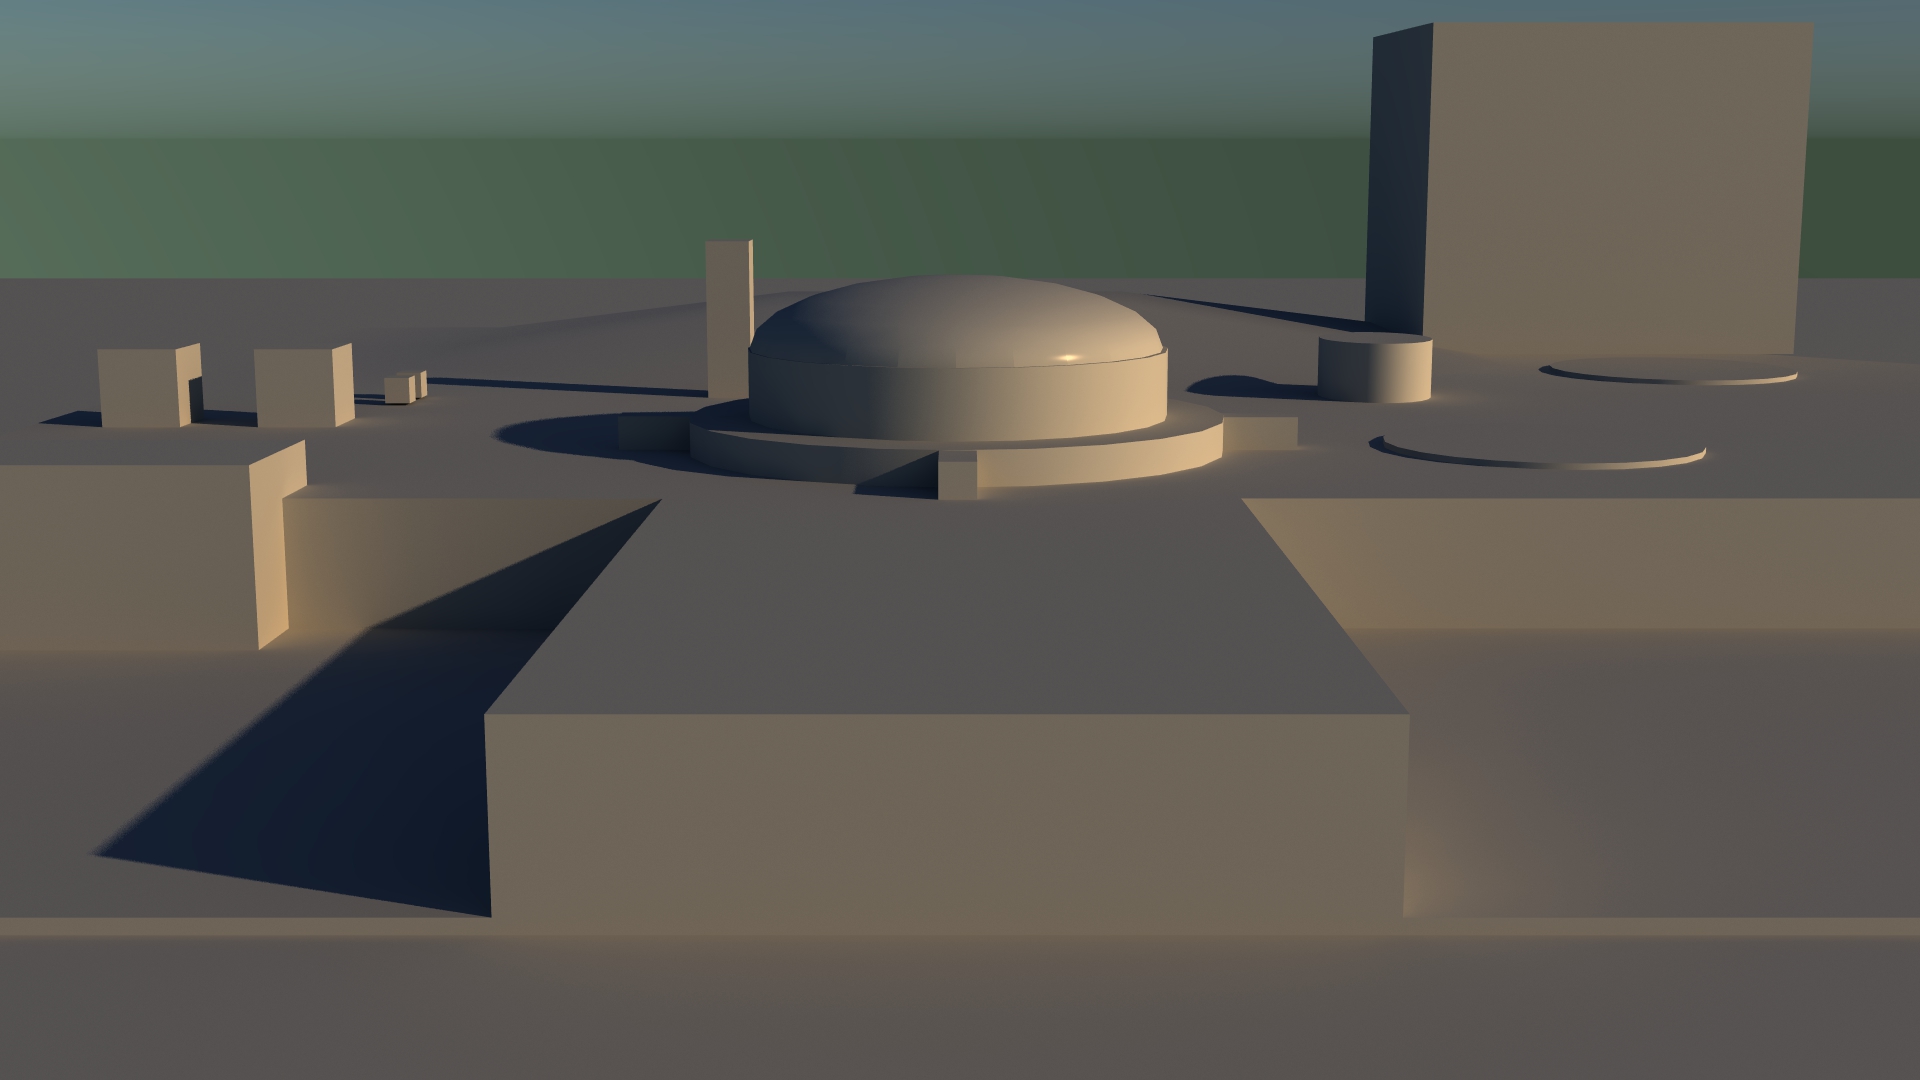
My next step was the building of the main dome. I knew that i'll use a lot of instances, so right at the beginning i started to think.. well... in instances (but when i reached the end.. it really didn't matter at all, but that is another story :) )
Back to the modeling:
Because of the 4 cardinal points i made 4 main entrance parts ( they are different than the rest of the walls).
The base was just a simple circle (72 sides for the sake of simplicity). And i built the wall onto this "circle":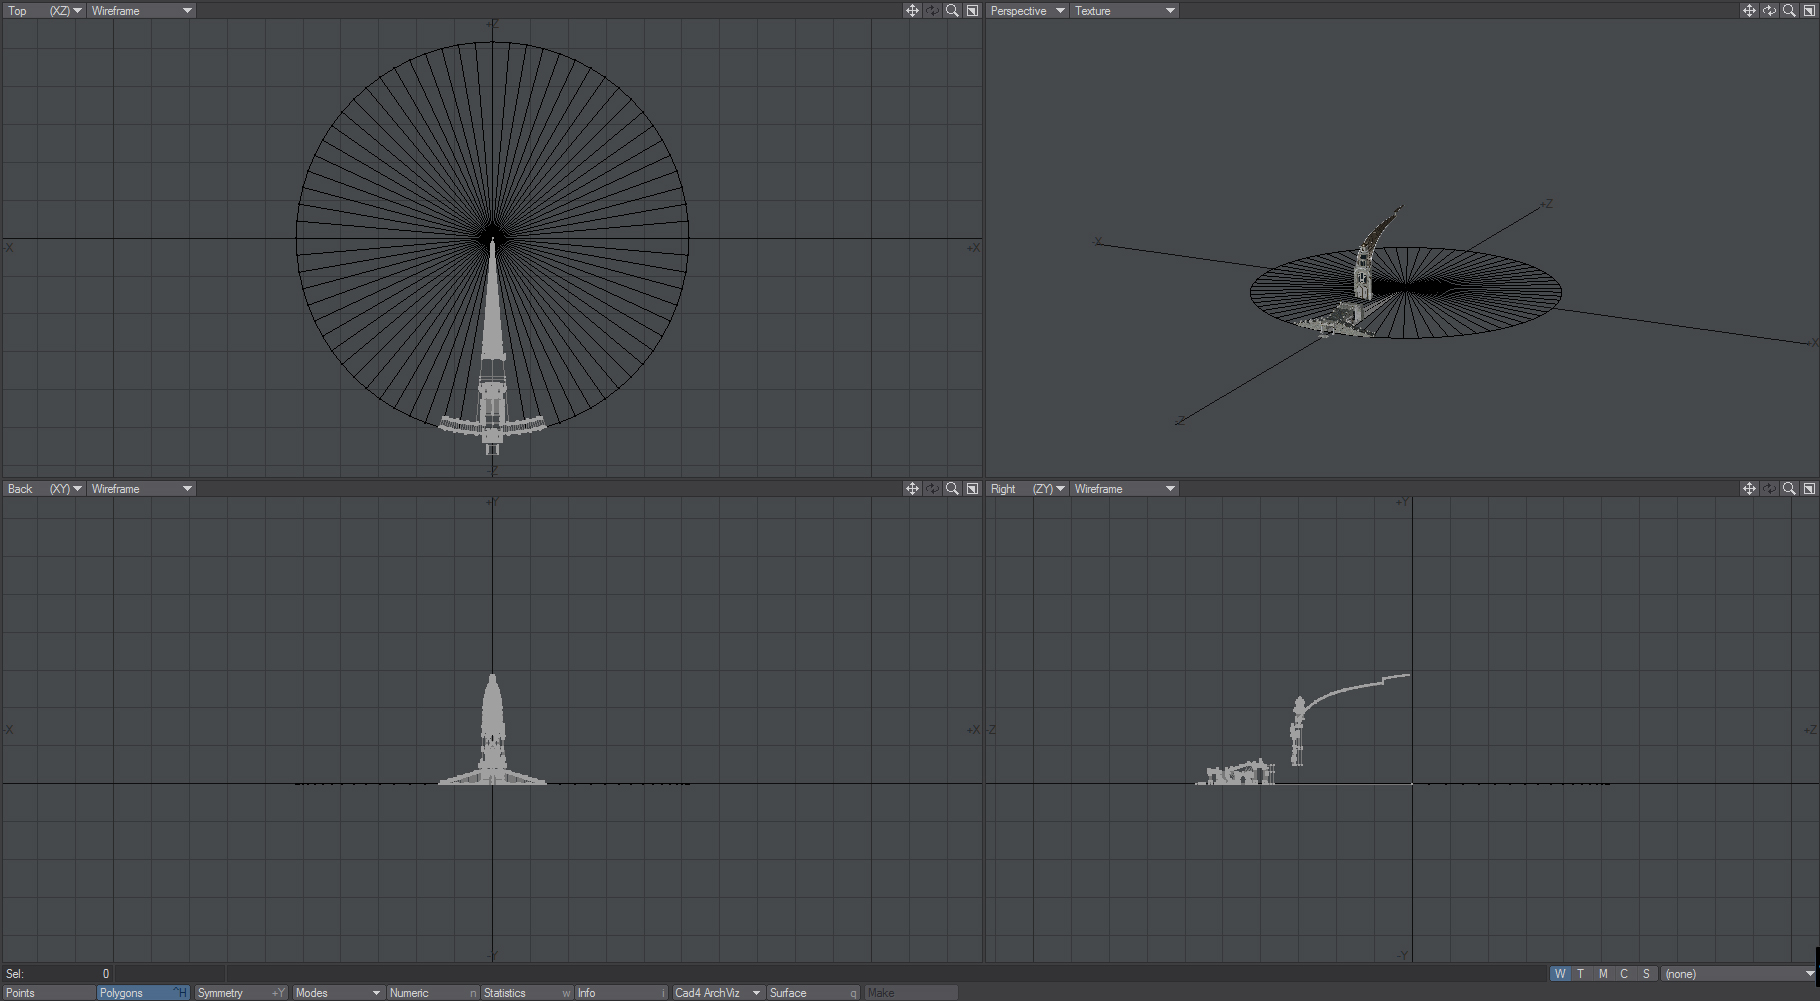
The entrance part: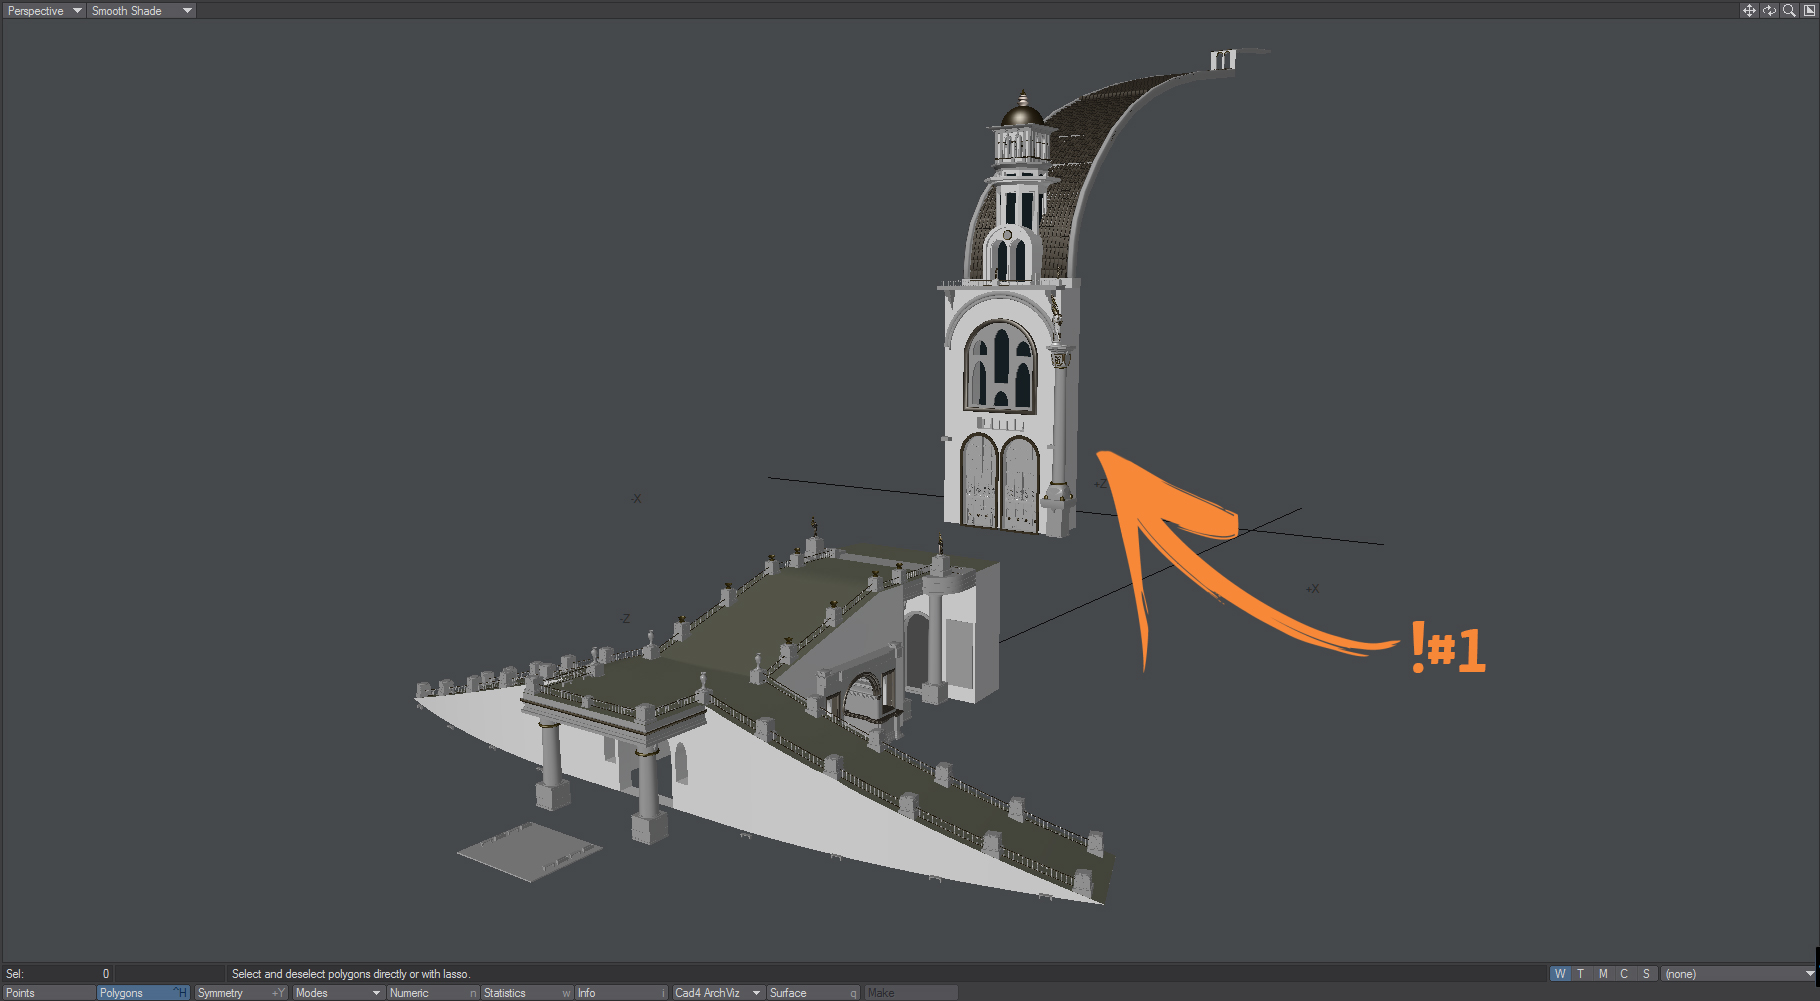
!#1. note: Because of the radial array, only one coloumn needed.
And the rest of the parts (I wouldn't explain the modeling, it is nothing special only poly pushing back and forth... and stuff :) ) Obviously only one coloumn needed here. OR another workaround: create the wall pieces and the coloumns seperately. In that case the coloumns would be exactly the same. Well, they are.. duh... 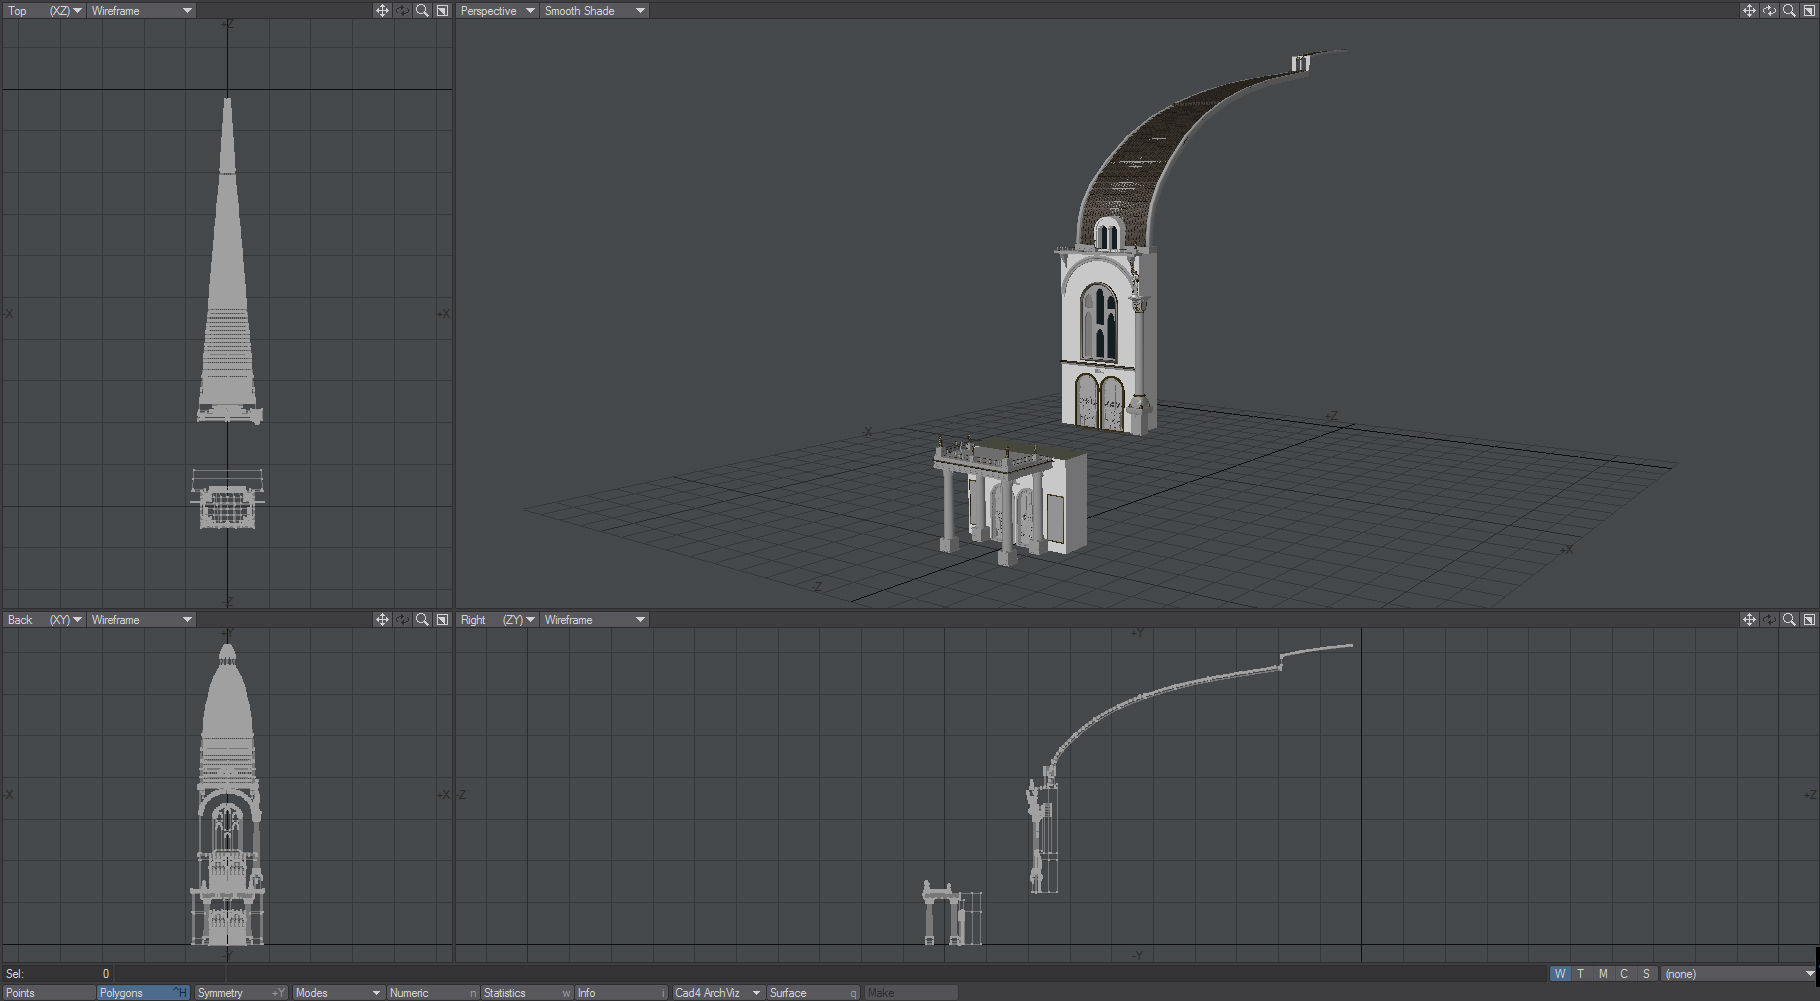
The instance settings for the main monument. It is laying on 0 0 0 so i didn't had to change anything, just hit the instance generator and set up the radial array.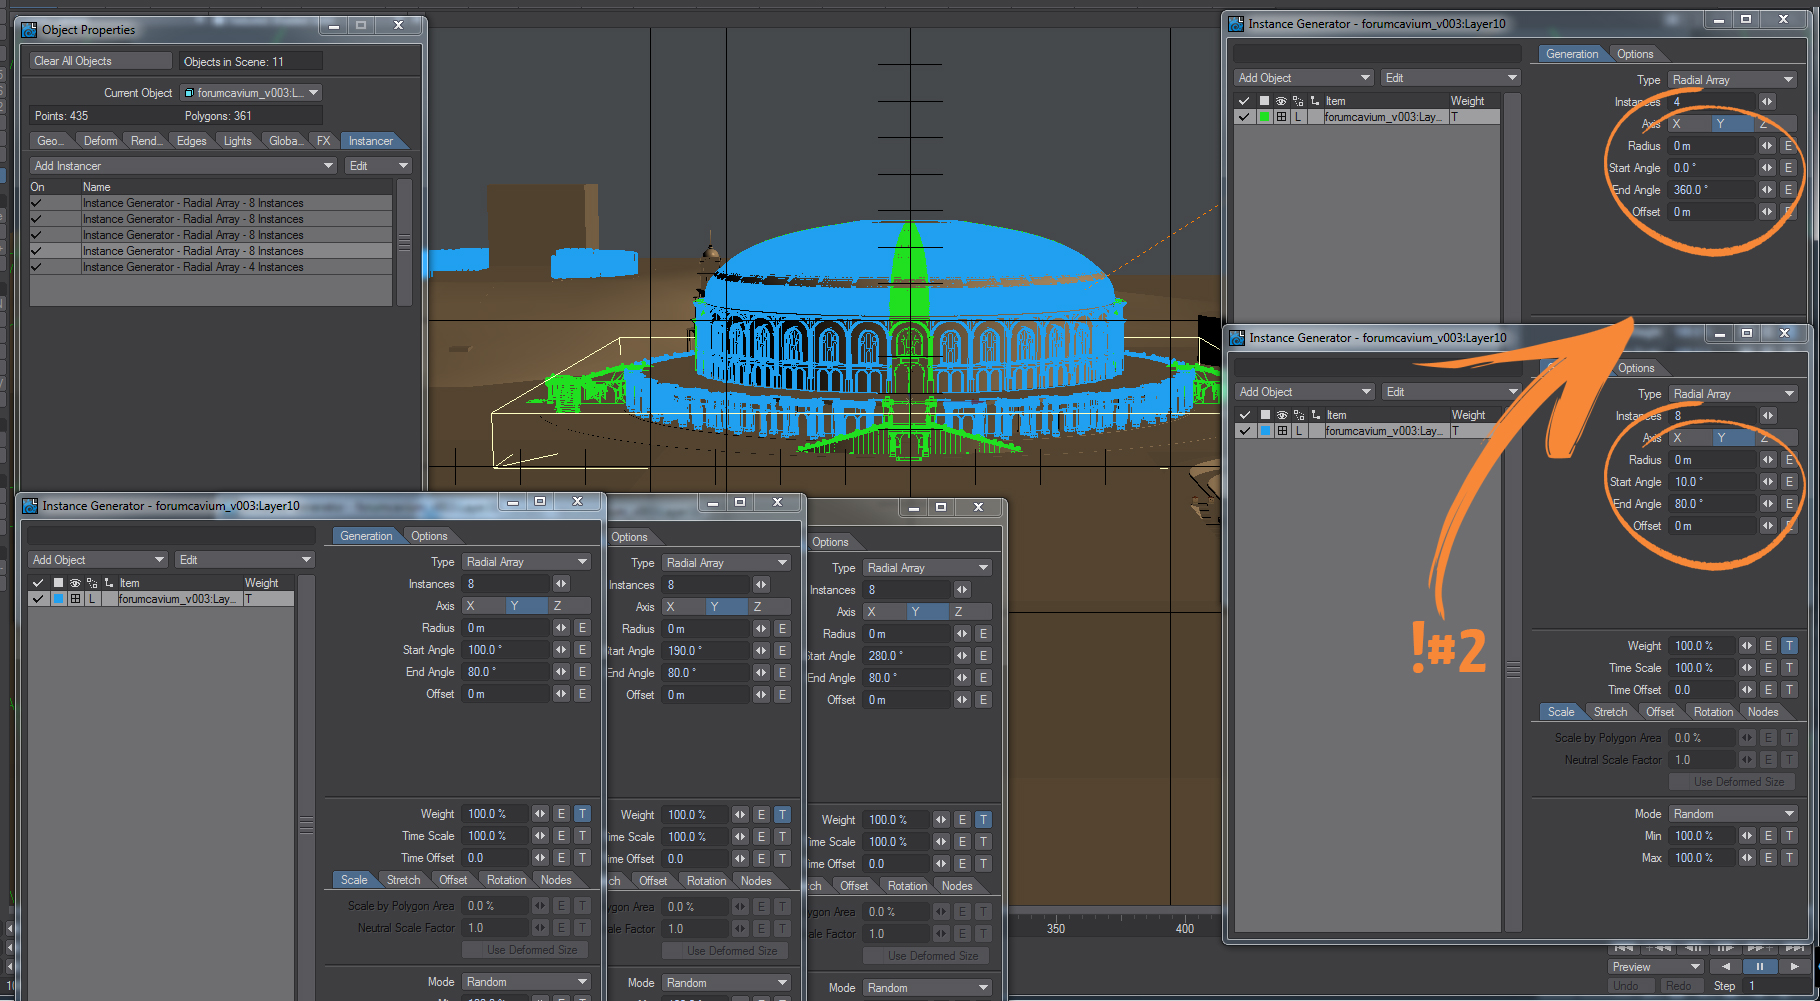
!#2. note: 36 wall pieces total, with 4 entrance parts. The rest (32) are simple wall parts. distributed to 360° degrees, whoaa what a surprise: there will be a part at every 10° :D.
And the reason of the 5 instances: i had to separate the main entrances and of course i had to put the normal walls apart. This means 1 entrance 8 wall X 4. Of course for the 4 entrances i used only one array with four pieces. You can check out the settings for the arrays on the screenshot abouve, but the initial angle is the gist.
Okay, next step: i started to build the basilica and the buildings. Simple modeling, archs, walls and windows. No detals at all (yet) .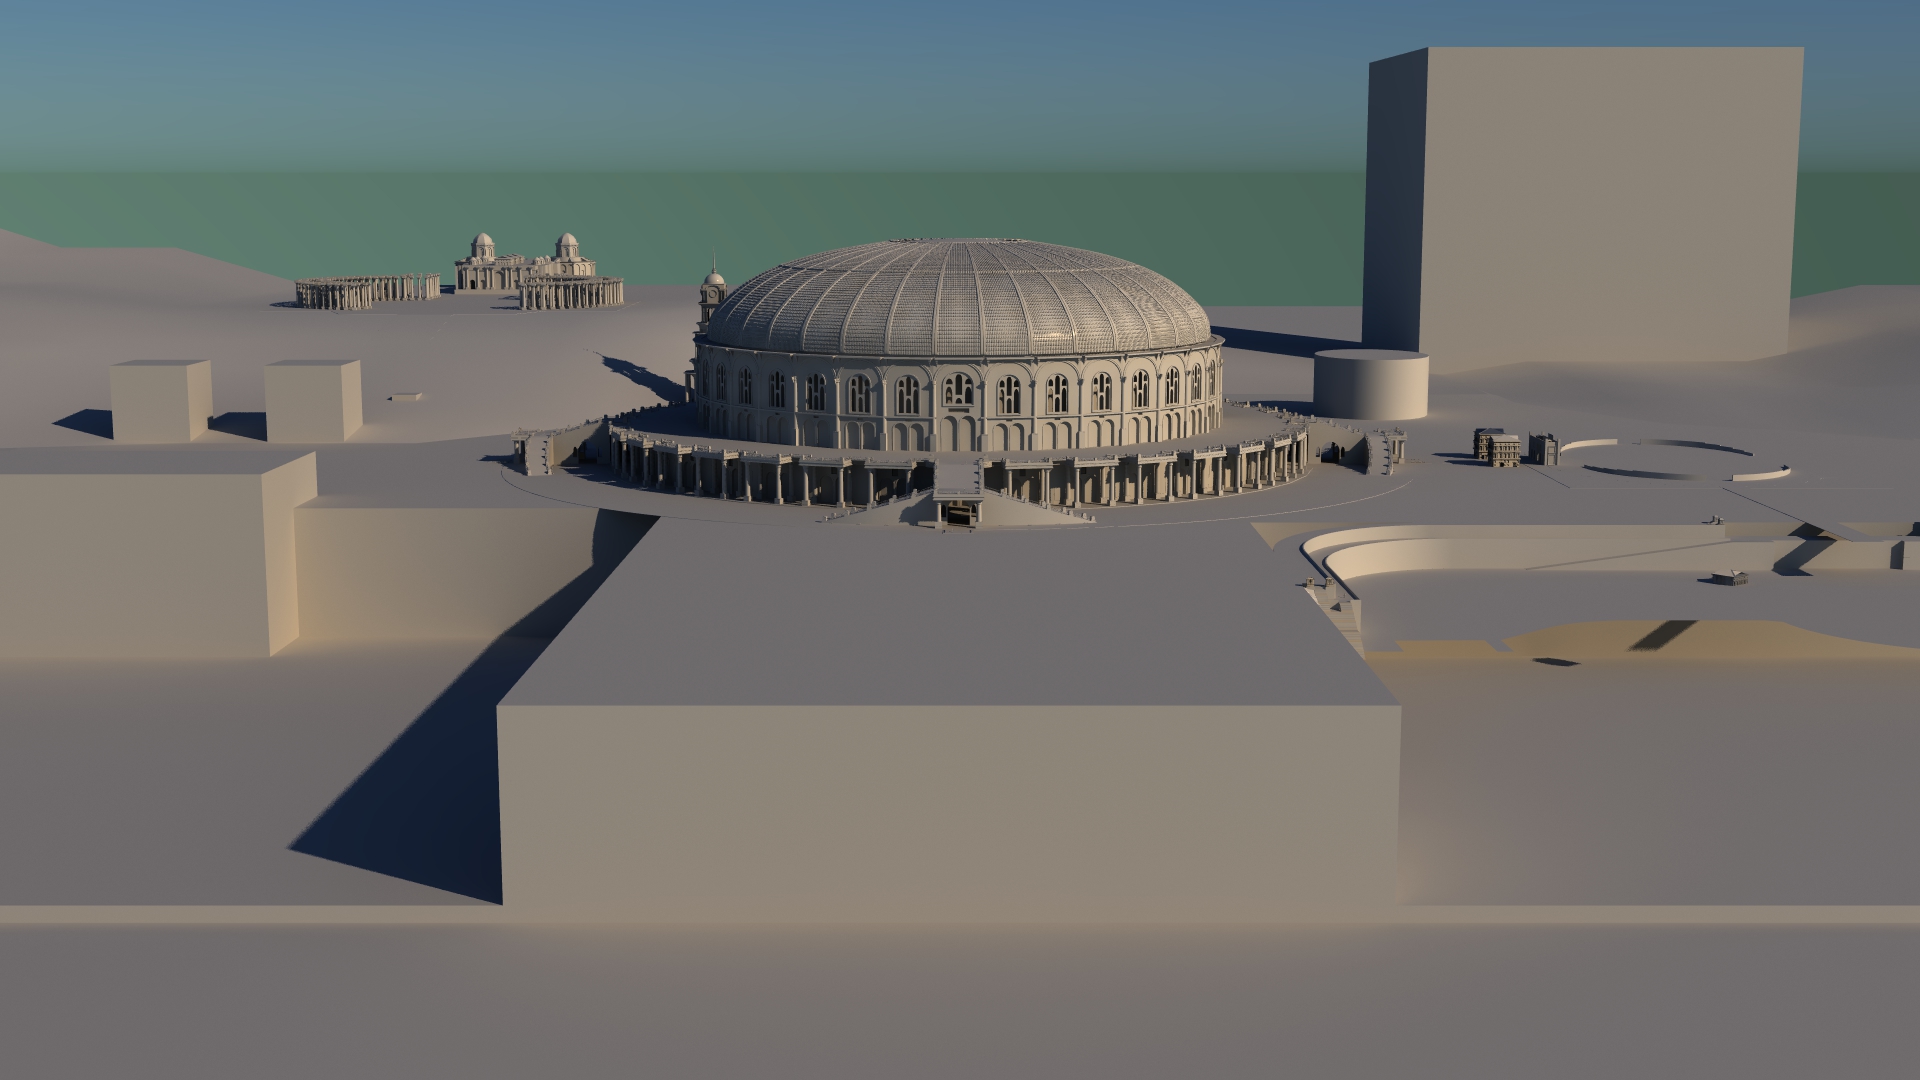
Oh, the basilica: the coloumns are instances too. I made their position in modeler (simple circles) and used the spikey tool to divide them and right after that i cut the middle points and pasted them into a new layer. Later i renamed it to "hey, this is a point instance layer for the bigger coloums" layer :D simple as that, we saved a few polygons. Eheh sa i said previously, at the end it really didn't matter at all. The rest of the work was simple modeling again. 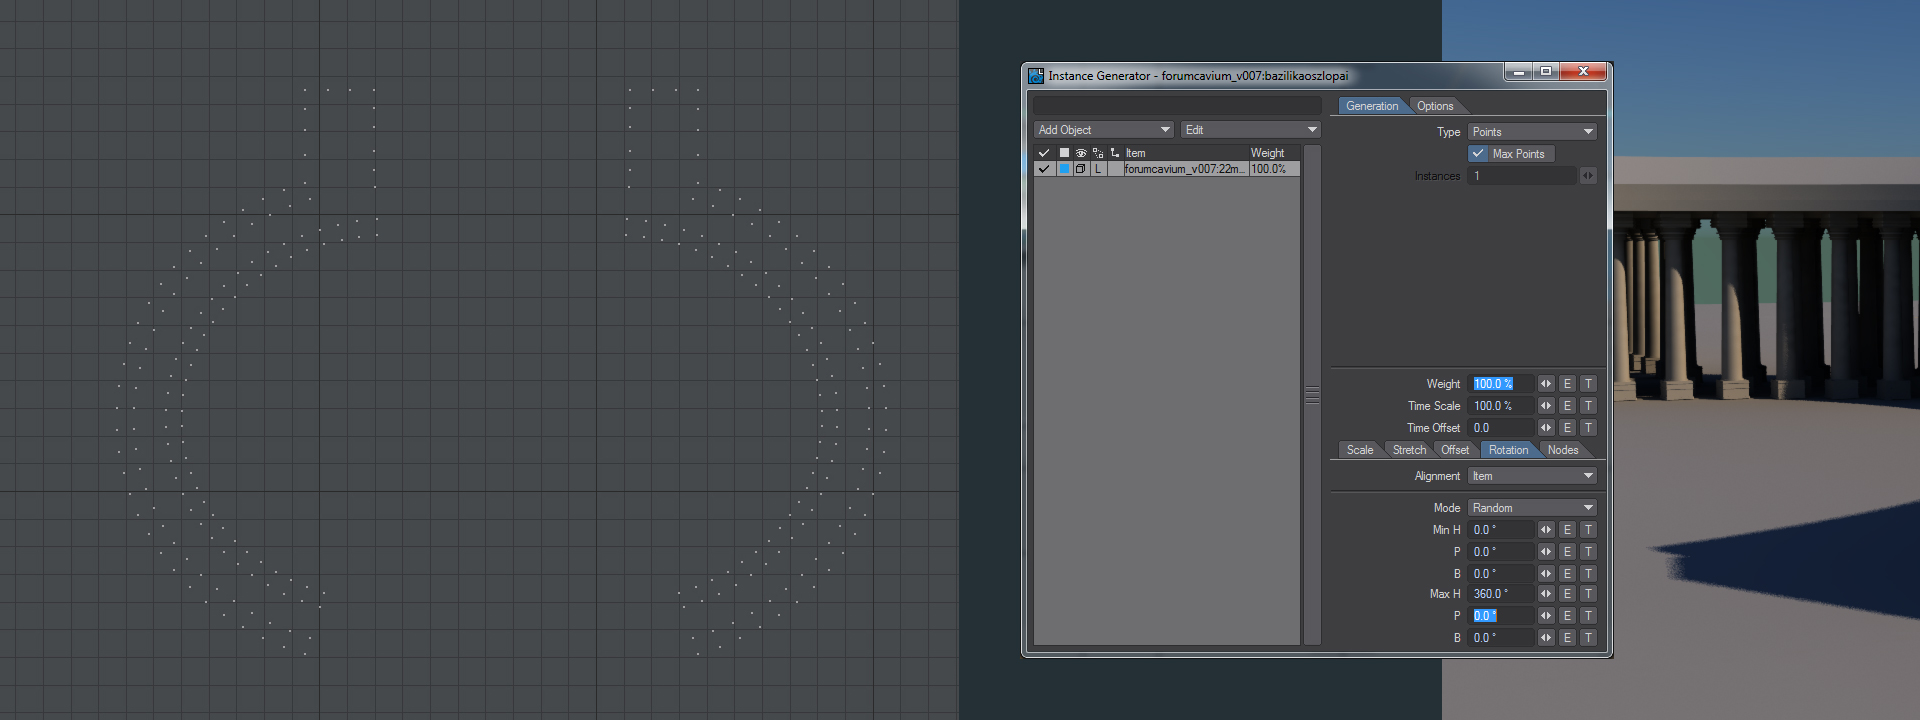
The next phase: I started to build the rest of the smaller buildings and because i wanted to use instances i had to get tricky a little bit. I made the foundations and renamed their surfaces accoring to the desired bulding. (building 1, 2, 3..etc etc )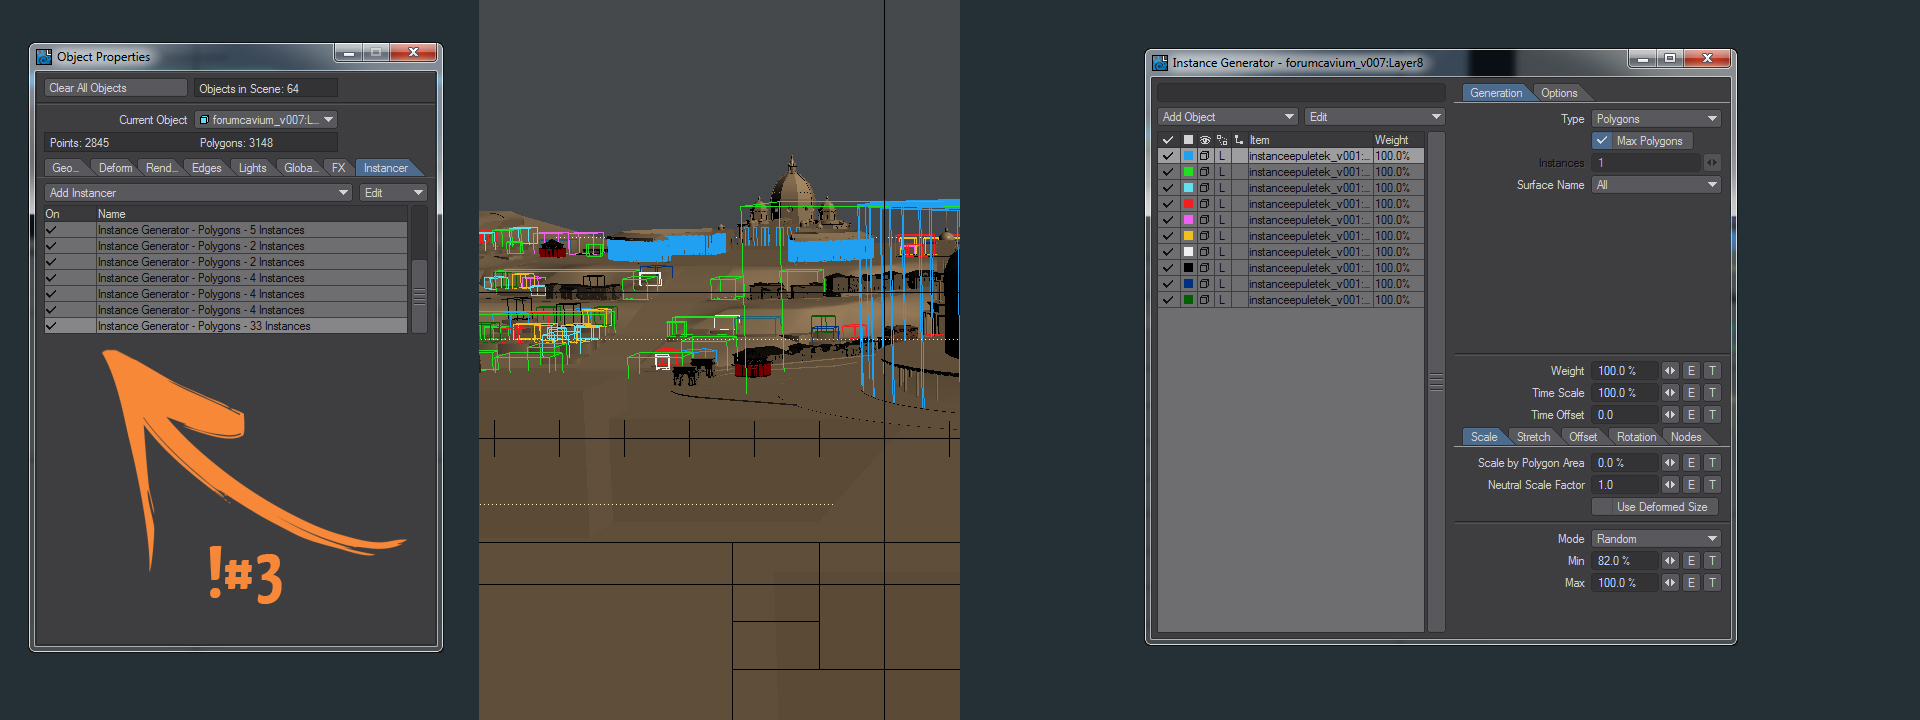
!#3. note: important, at this time i only had 10 buildings or so ( hhahahahahahaha ) So it was pretty easy to control them with foundations, except the last instance area. i dropped down 33 buildings in 360° randomly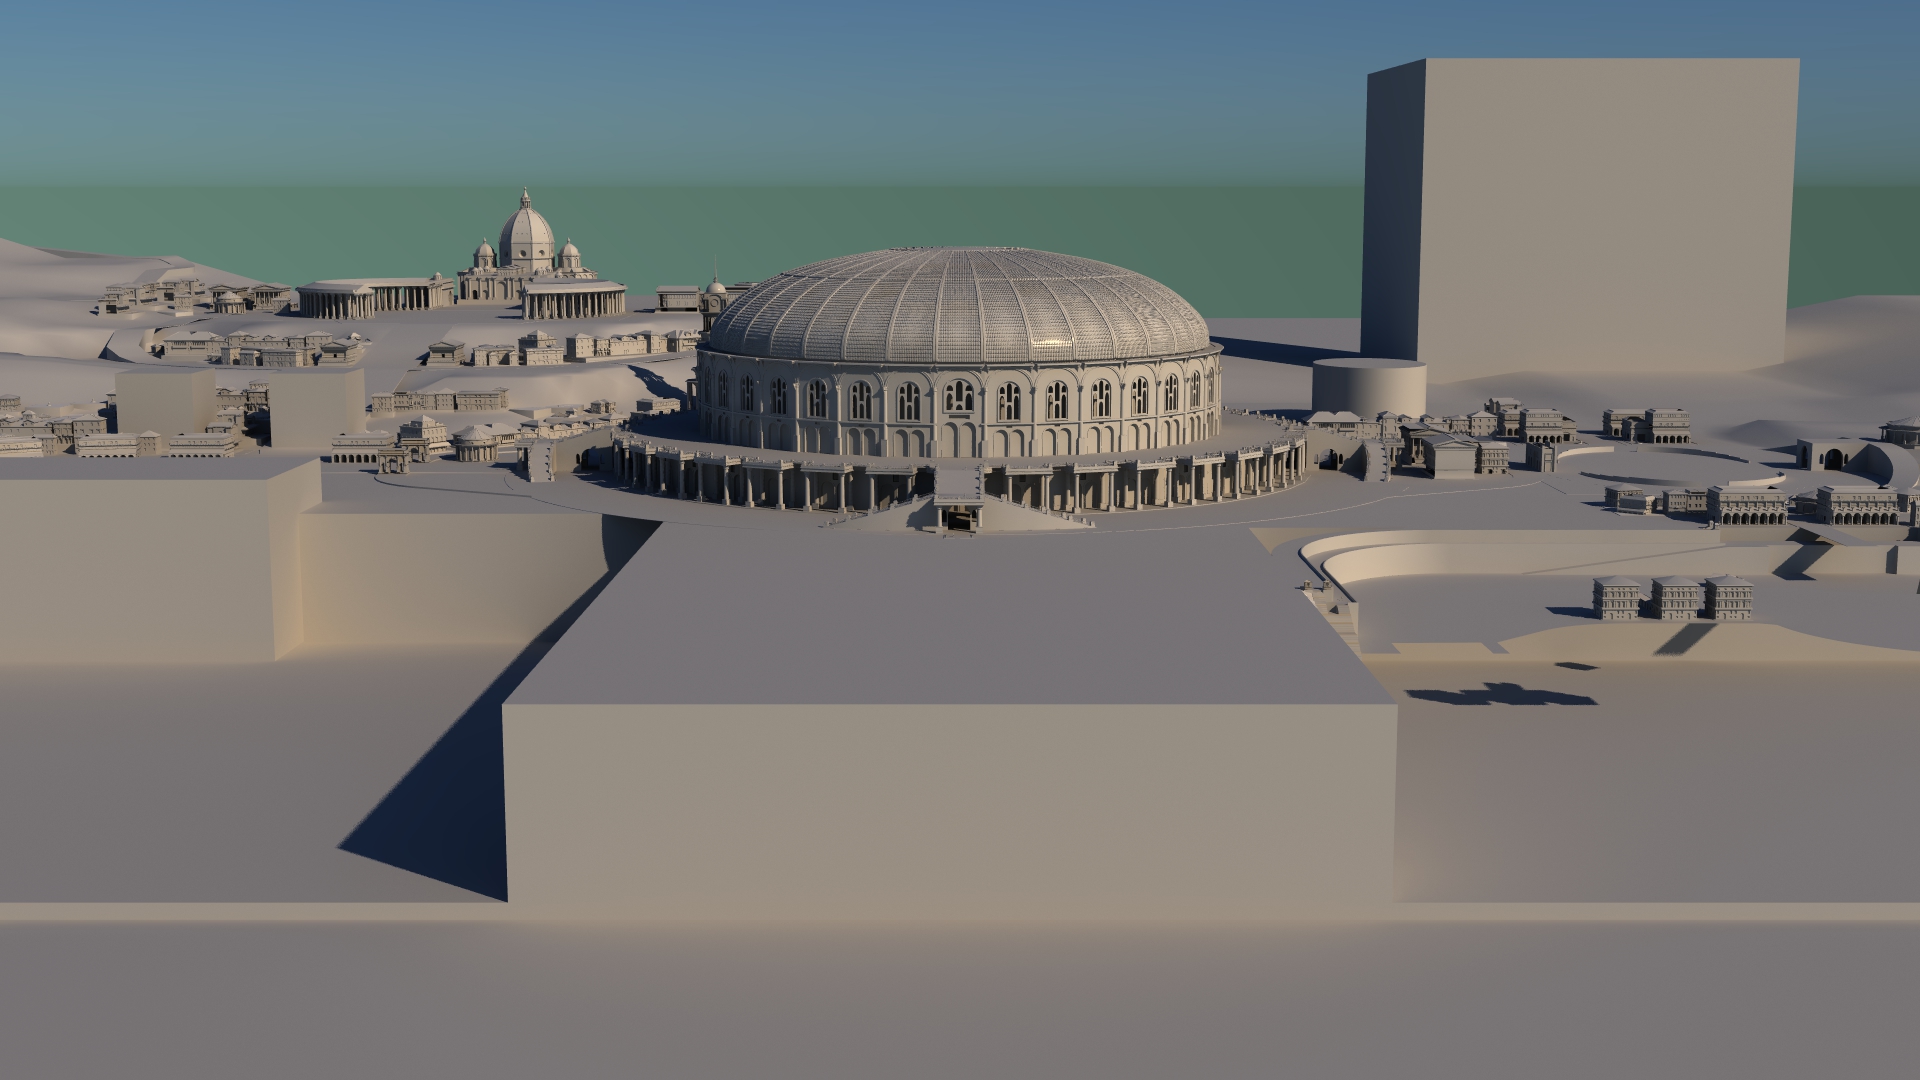
I continued with the arena and the theatre. The usual radial array, but with two little "tricks". I distorted the arena's null a little bit, so it is not a full circle but more of an oval-ish ( is that a word? :D ) thingie. The other tthing is the array of the theatre. I used only 180° and not 360° for the arrays. Aaaand obviously i continued creating more houses. 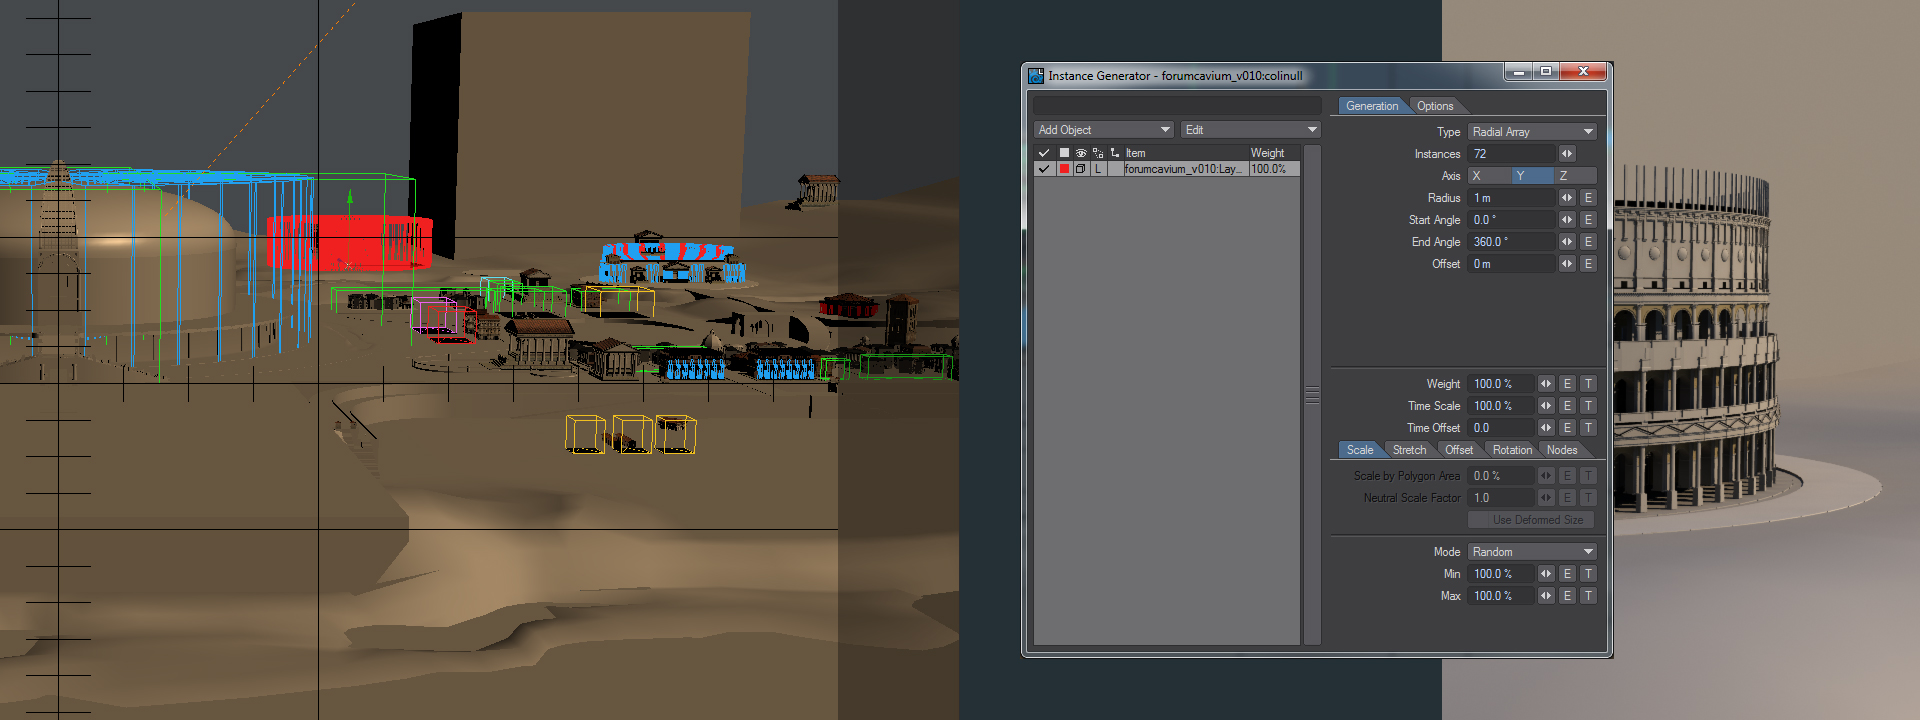
Okay, moving on.. next step: the harbour area ( yeah i was jumping in zig-zag).
Again, nothing extra, simply walls, archs and stuff. And more buildings ;) Oh yeah, one more thing: The buildings are instances, but for better layout i used the originals too. I moved them manually into their desired location. So the overall layout became better because of the variety.
From left to right, here comes the front area. Mostly i dropped down the buildings manually, but i created small polygon islands ( i know, i know the polyigon island is a different term ), anyway i created polygon parts for the instance buildings, so i was able to create a dense downtown feeling. The red is the road, the grey spots are the islands for the house instances.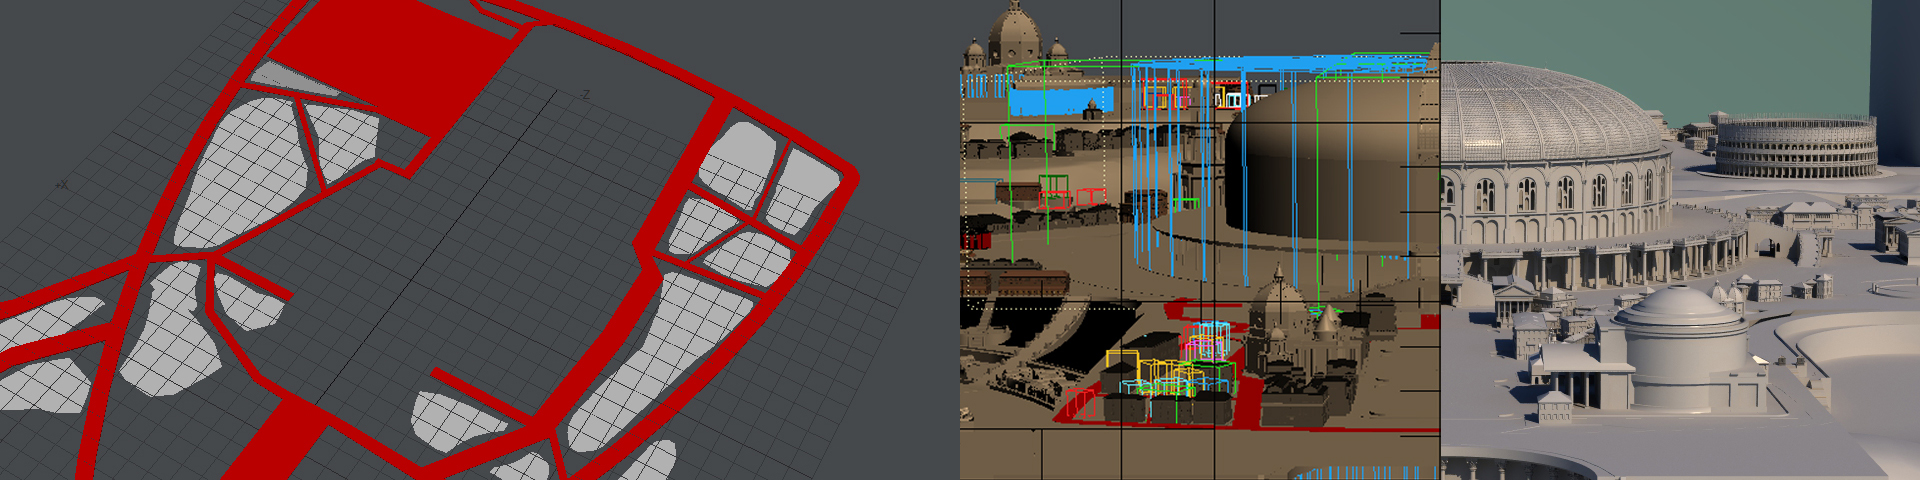
Next one.. the bath area ( i have no idea why i gave this name for that part :D ) Simple modeling again: walls, archs, doors, windows ( not THAT windows :D ) Right after that: the palace. Same as the rest of the builings, but i used.. yeapp, you can guess it: radial array for the round frontal building.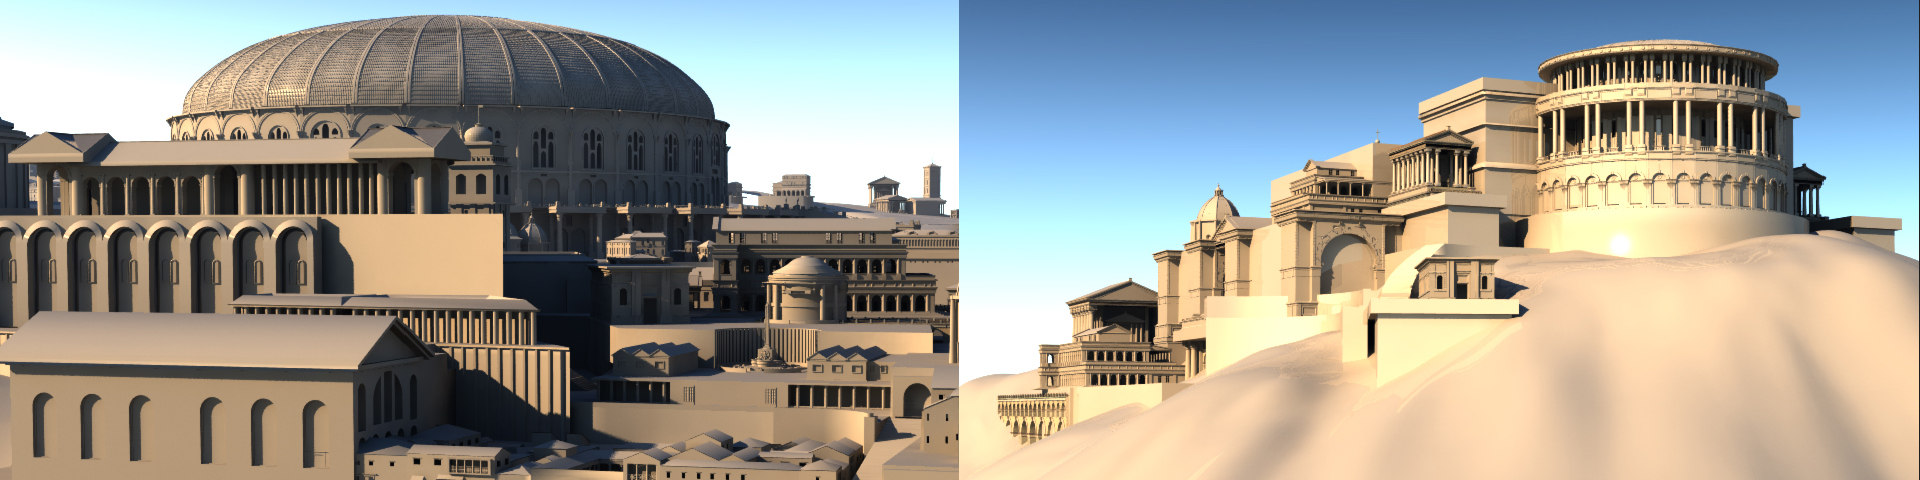
All right, the basics are ready. Next step is adding extras: trees and the market place in the harbour area.
Instance, instance, instance :D. Oh and i started a galley right after my lunch :D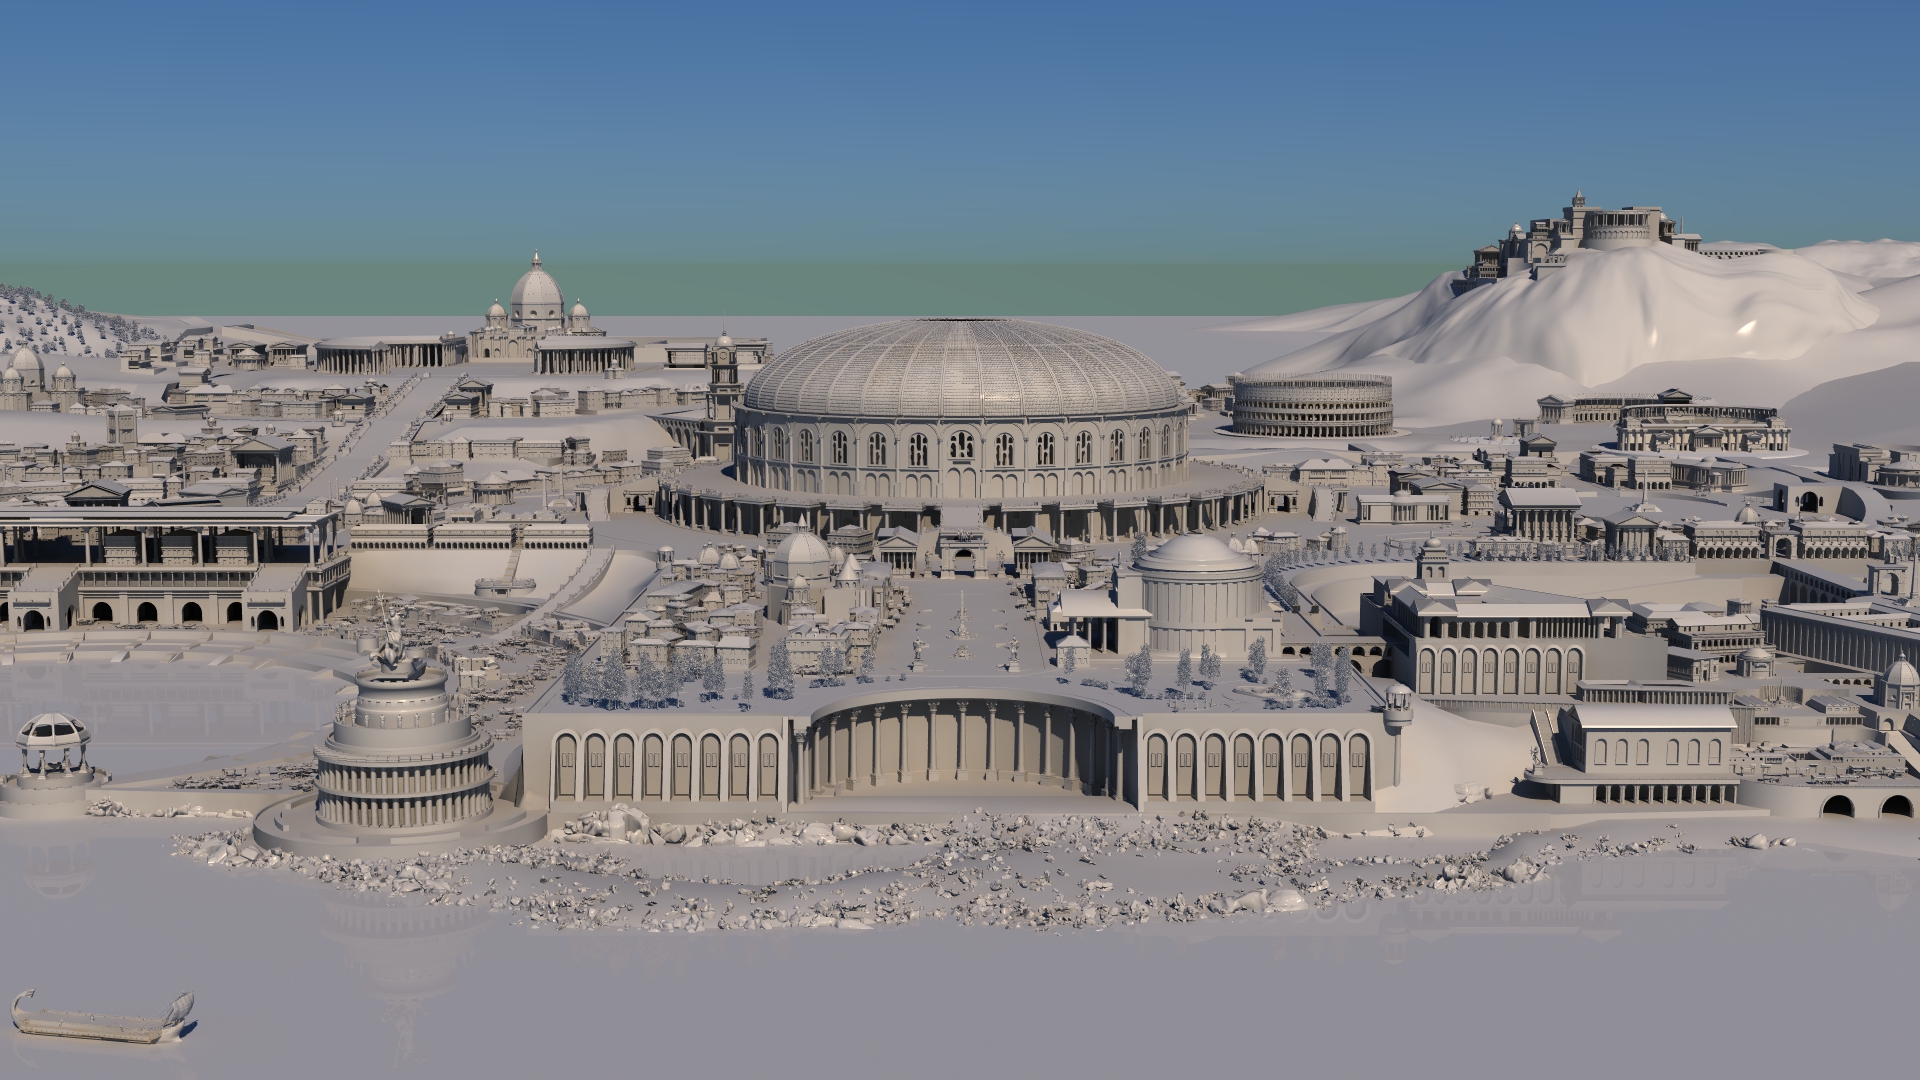
more trees, bushes, a few kiosk and a couple of statues, things were gettin' dense. one nota about the small shops in the harbour area: i created 26 different versions all of them are a little bit different than the others.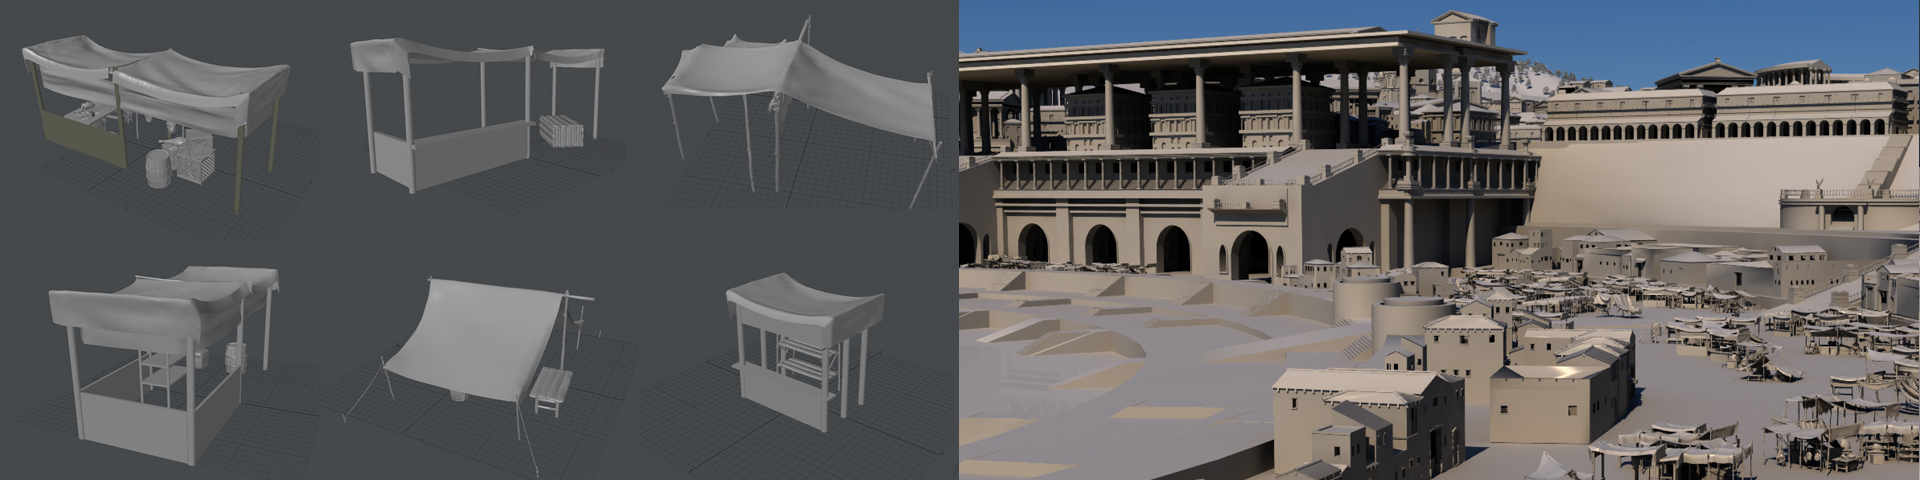
The scene looked like this :D 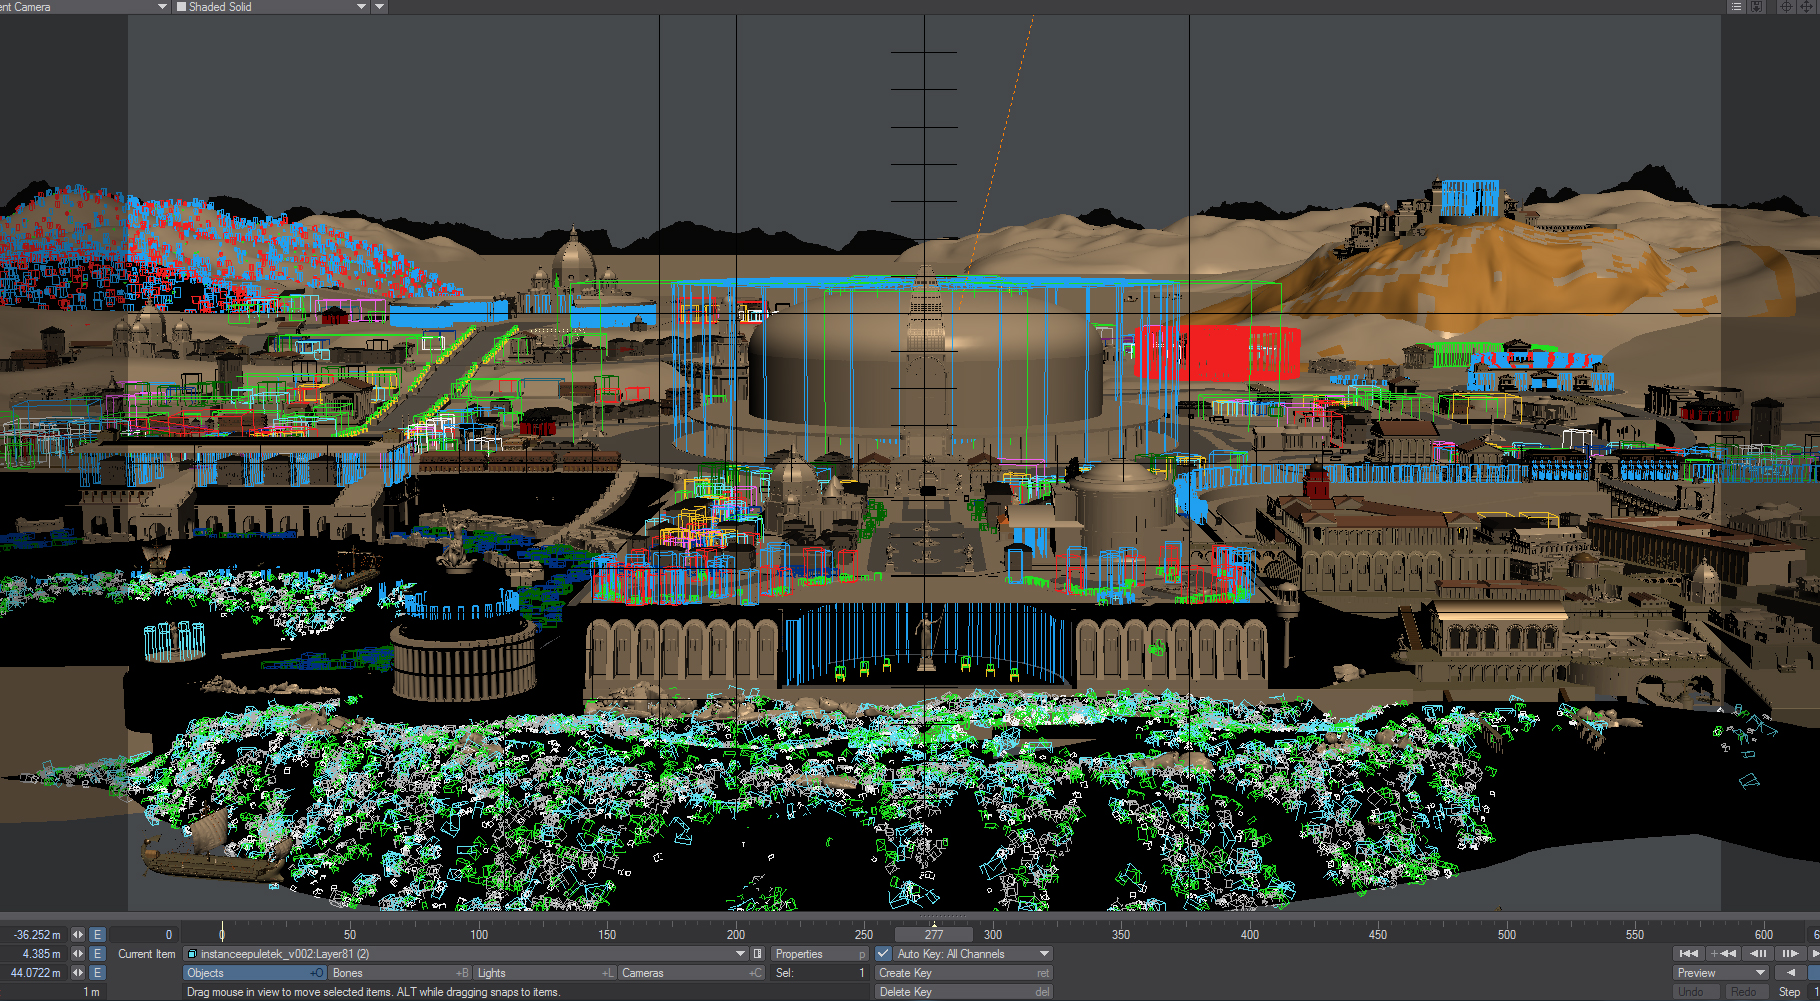
Oh, damn, i almost forgot: the trees and the shops settings!!!
Okay, they are instances, but somehow i had to control them, i couldn't use just the generator to flood everything with the trees, right?! Sooooooo i created an ortho camera above the whole city and i drew a few maps. The orthographic camera projected these maps onto the surfaces... ie weight control.
Here is the marketplace: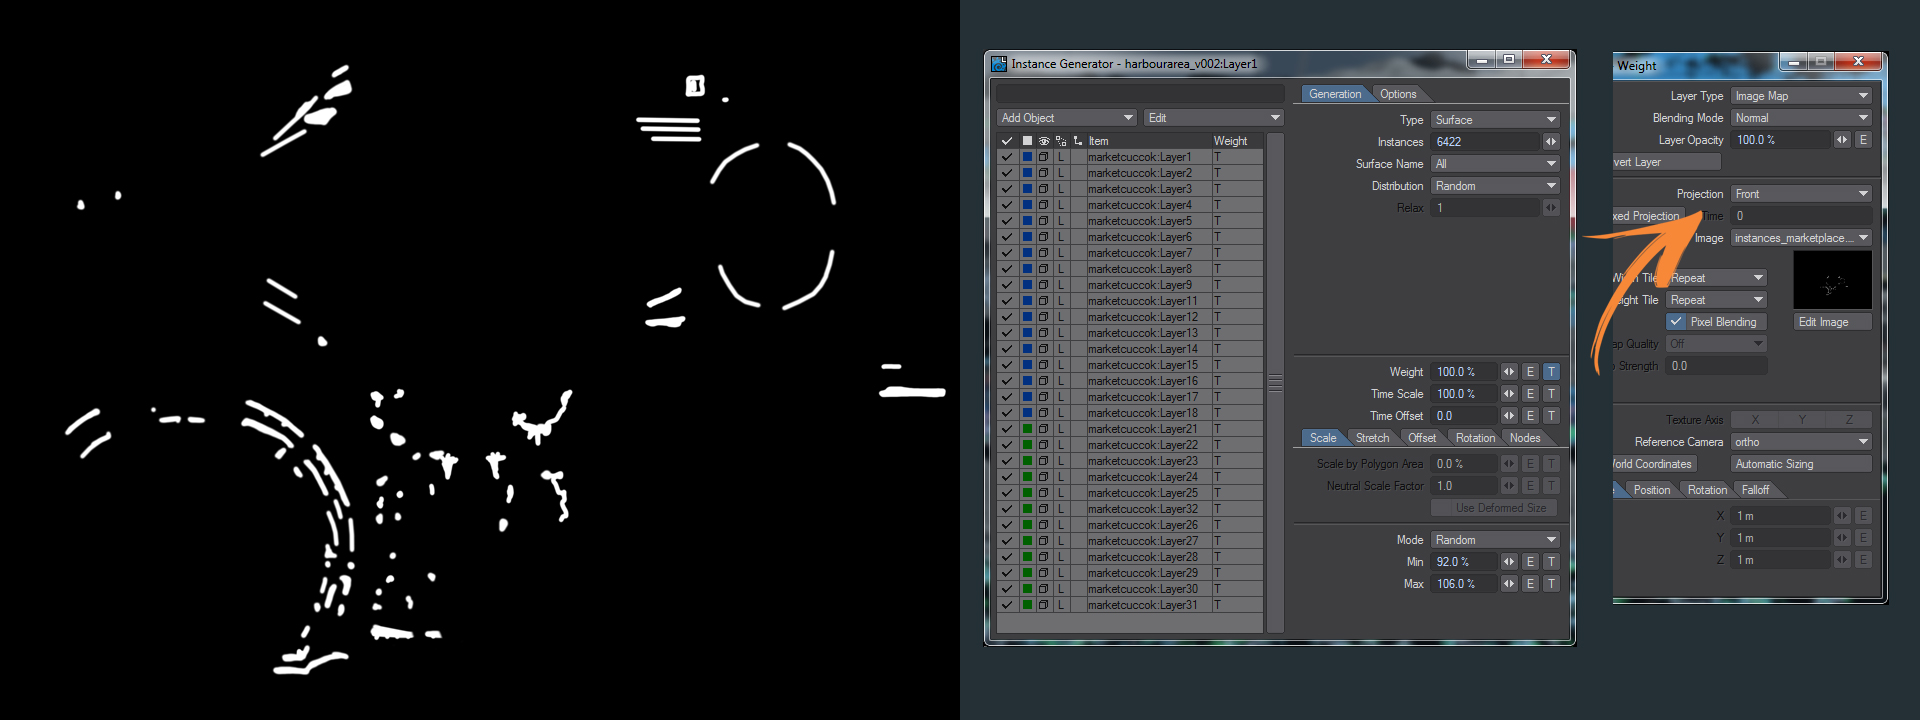
And obviously (just in case) i created seperate maps for the trees, bushes, rocks and one more extra for additional trees. I had to do this only with the crowded areas where i couldn't use just random objcets. Well.. basically everywhere... eheh. :)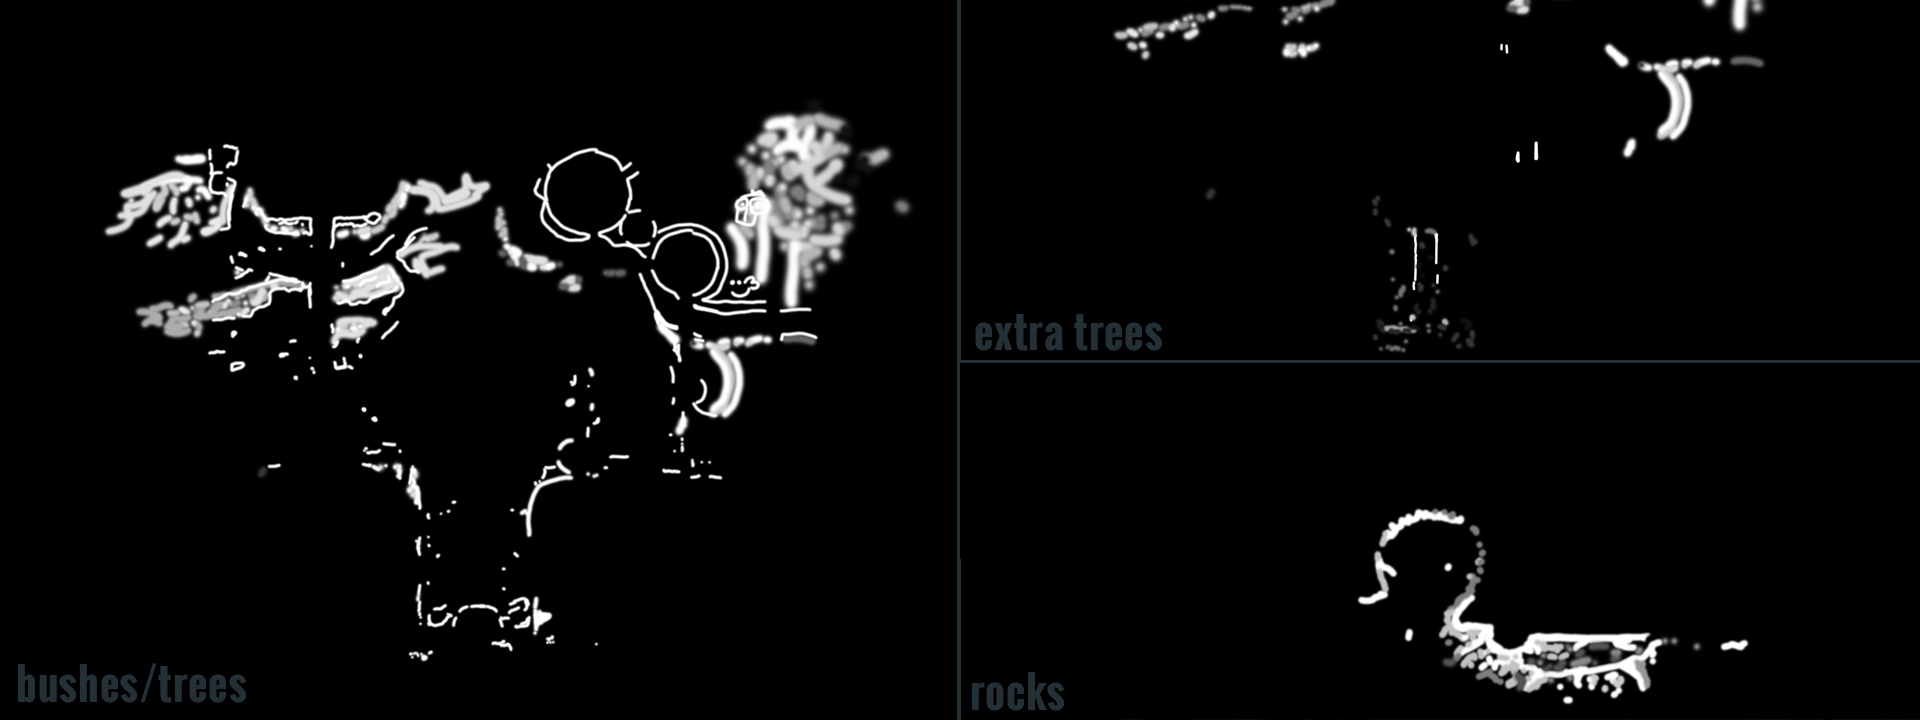
And this is the control map for the pedestrians, pretty huh? :)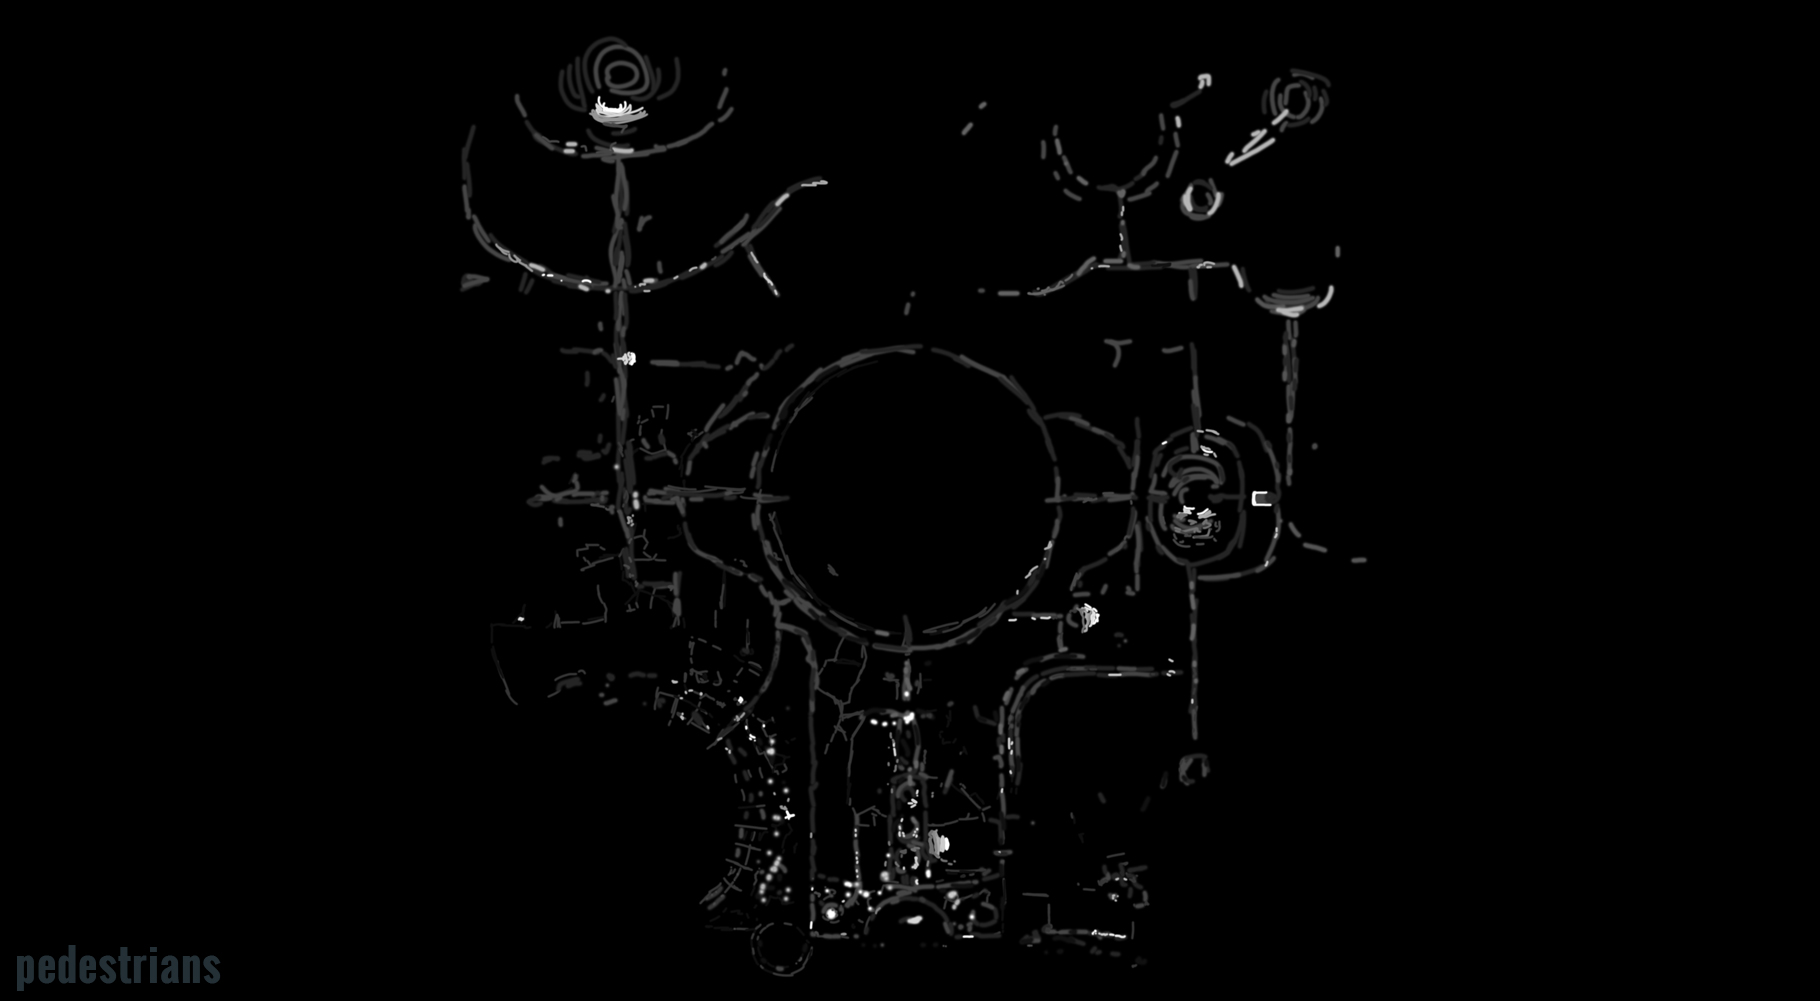
And about humans: they are barely visible, even in 8K, an enormous detailing was unneccessary. I used makehuman to create various people and dressed them up in LW. And i used makehuman for the human statues too, because of reasons :)
Anyway, back to the pedestrians: 10 male 8 female and 5 soldiers, all of them had 5 differet textures. And one more thing, i created a simple walk cycle with different poses and saved the transformed meshes. Of course i used genoma, WHAT ELSE? :)
Right after that a small beauty make up and a few more ships.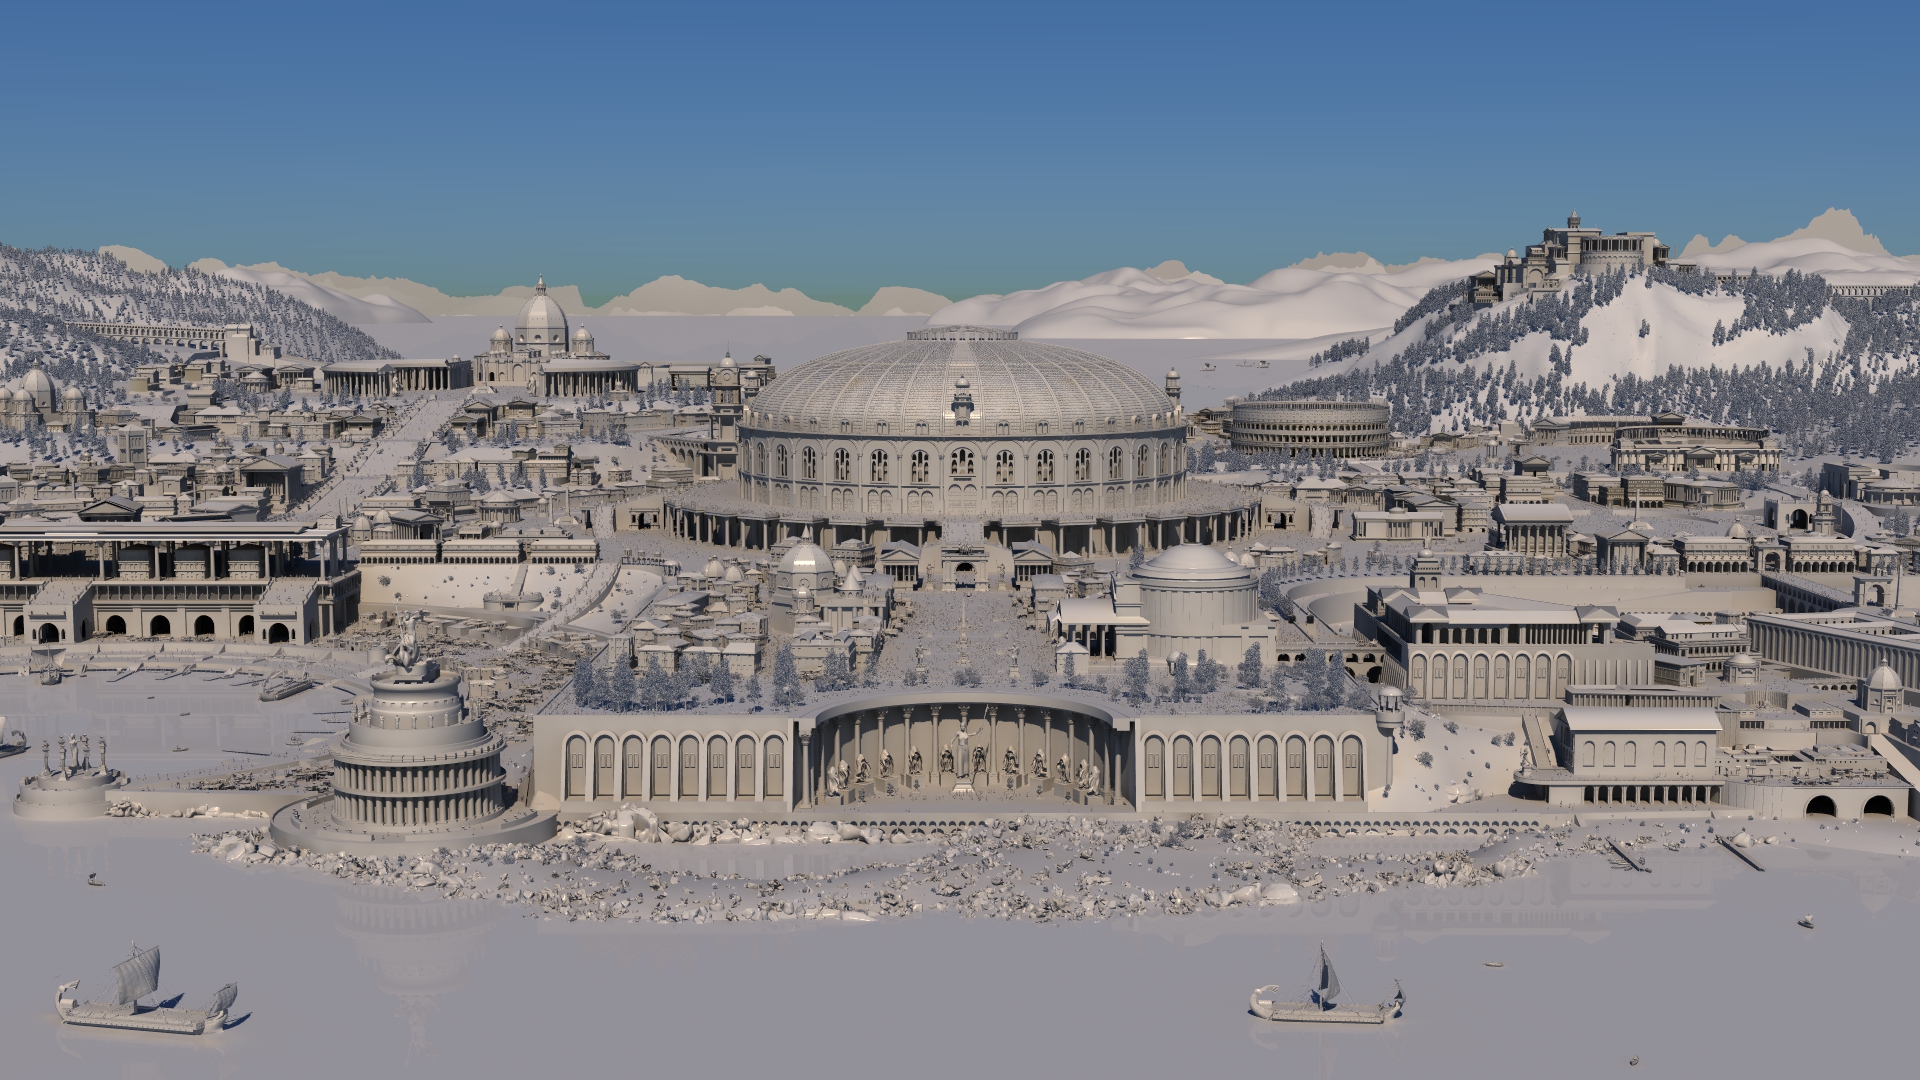
The modeling was almost one, it was time to do some texturing. When i get to this point i almost had 80 buildings ( most of them uv-d, but some of them... not.. lazyness.exe )
So let's say we have a building with 20 clones ( i'll count the instance numbers at the end).. back to the houses...
Probably it would be enough to use the same texture for the building and it's instances, but hey... let's give them a little bit more variety, shall we? I had to make different textures ( 3-5 textuers / building).
The reason i didn't switch the gradients to stepped, is to.. i don't know.. to smooth the texture a little on each of the instances. More variety, but without harsh differencies.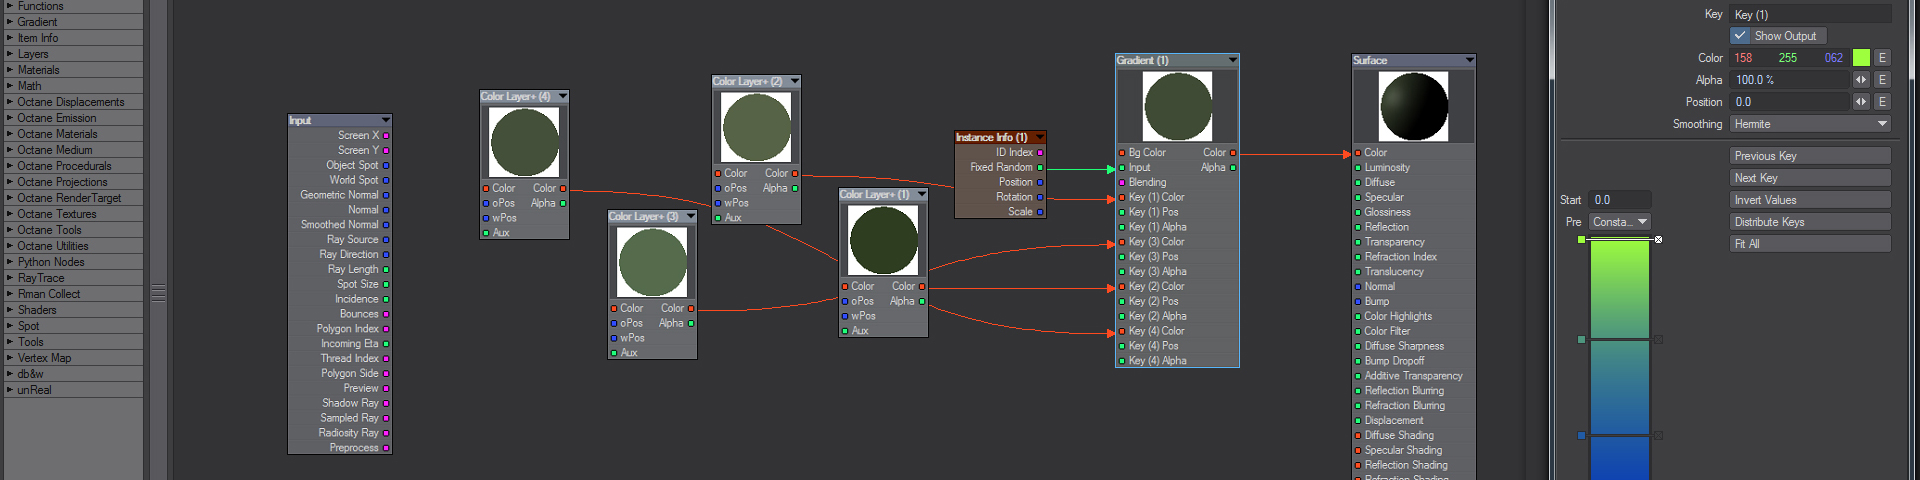
And i have arrived to the textures. Rember i mentioned the north-Italy tour and Rome? I shot a "couple" of pictures ( i must check out the amounts ) hehehehehehehe... i had plenty of resource images to pick from.:D :D :D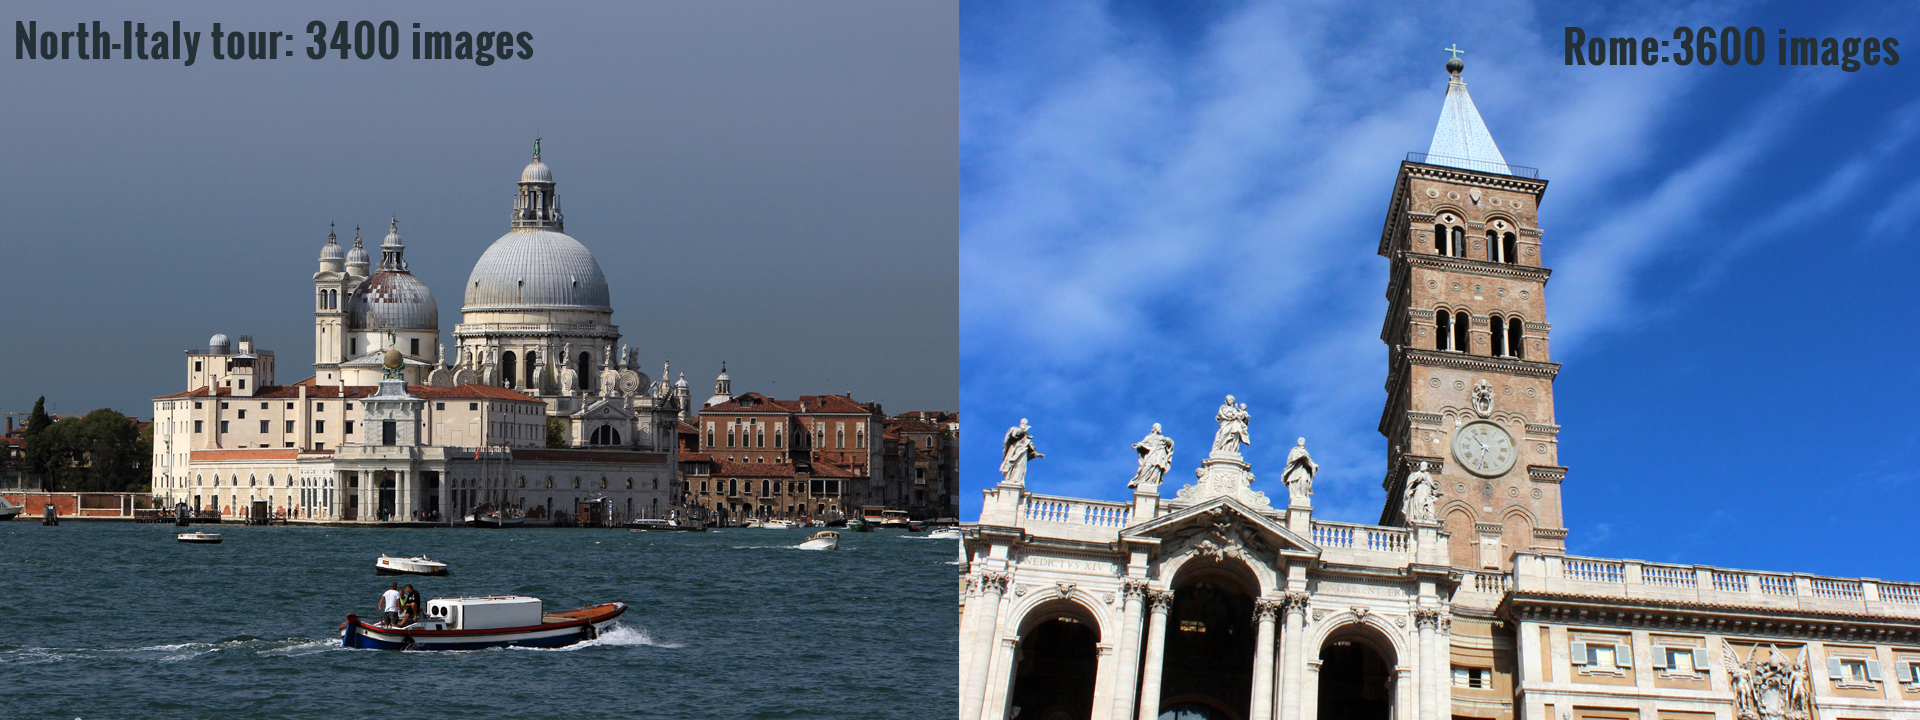
Of course, i was trying to pick the buildings without any modern stuff, otherwise i had to retouch them.
Here is an example: at first i had to crop the building (simple perspective crop tool in PS), then a little lens correction (because of the barell distortion) and finally a little color correction and retouching. I did this twenty times at least, eh. The color and small little decorations gave the veriety of the buildings. I left the bump maps alone, and just used the main texture's bumpmap. I didn't want to create 80 bumpmaps. Hahhh. another little extra, some of the building has reflective windows, just a few... i realized it is not worth the amount of work to create refmaps for all of the buildings. 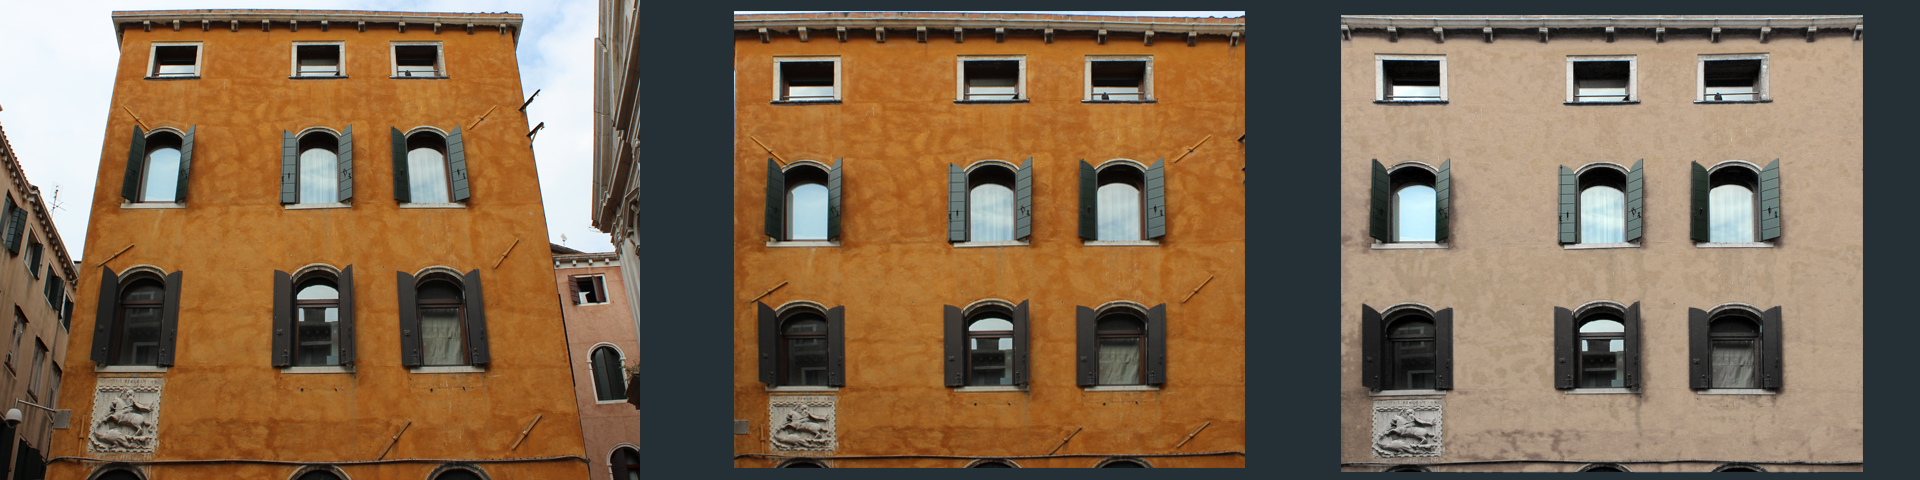
Just a few texture examples from my almighty Italy folder :D 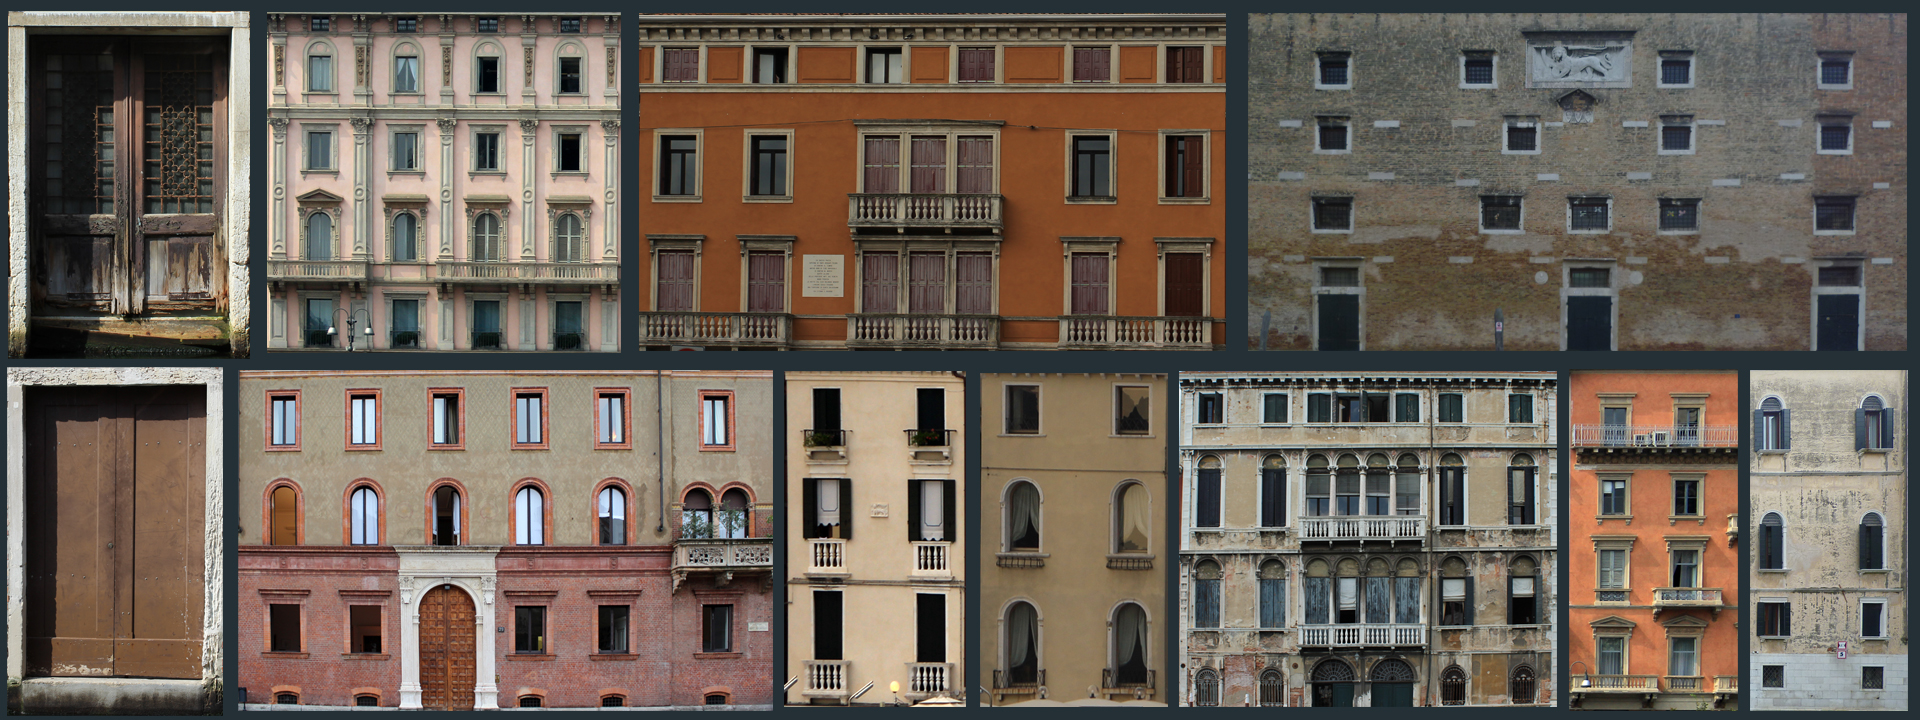
I had a few buildings without uvmaps, either it was unneccesary plus towards the end, i felt that i got most of the houses. And sometimes a wall just needs a nice tiled texture. and that's all.
The water: at firts i was tried a normal sea color, but i decided to go with a deeper blue, so the white buildings are "popping out" more. It came out nicely. The surface is a basic water surface, with an image map for an extra touch. The foam: texture again, but with an extra twist: i created a few polygonal foam islands and put them onto the seashore (a weightmap controlling the edge transparency). Here is a quick VPR render, as you can see, the city needed a huge refinement.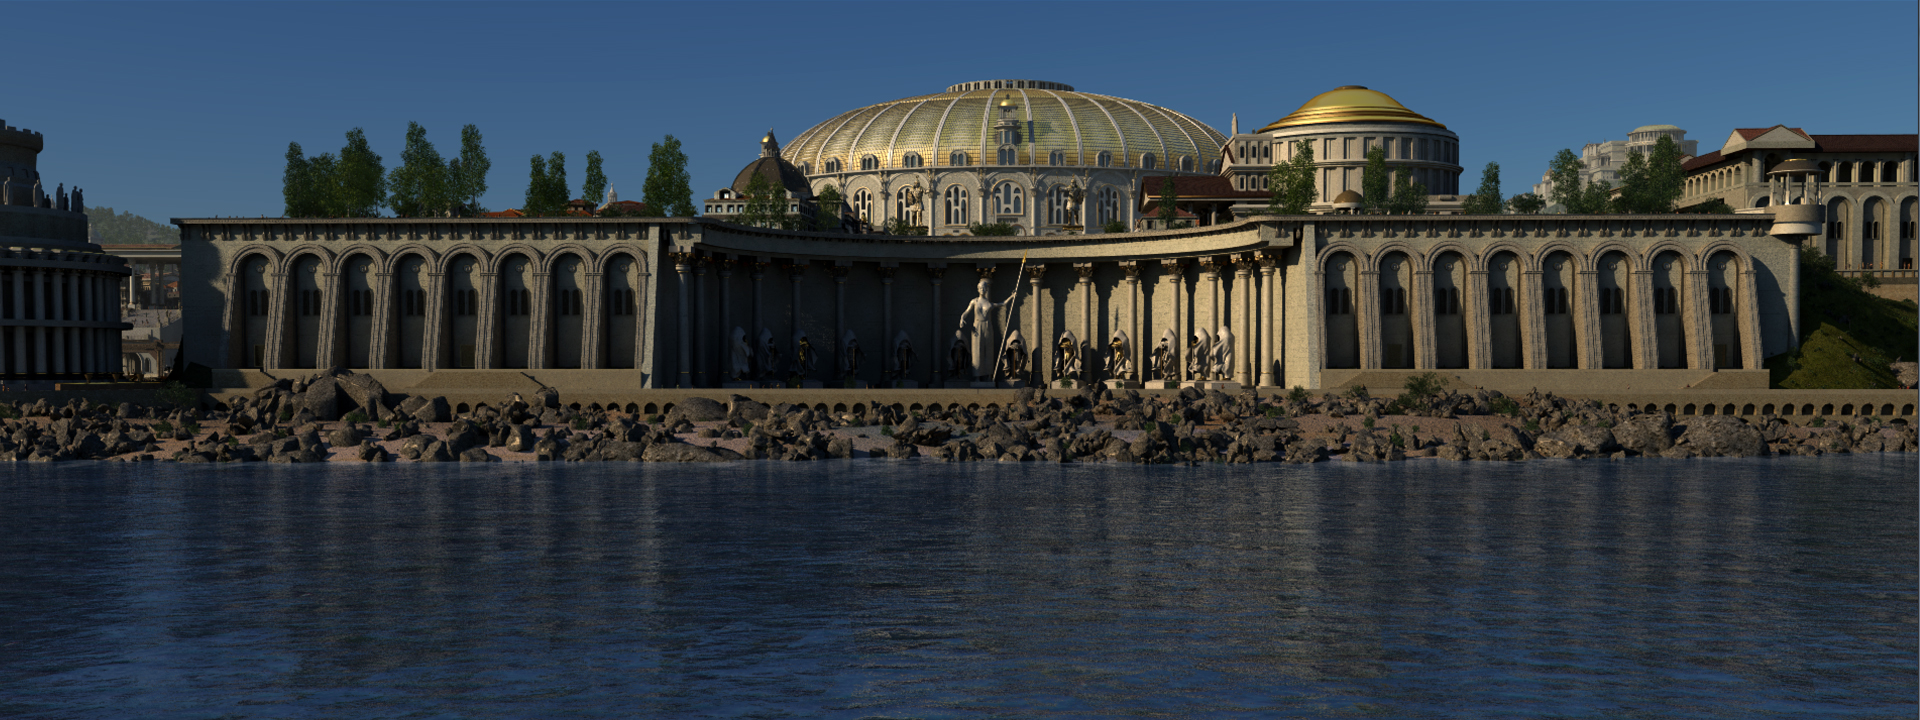
Getting there, i think...
Okay, refinements: i've checked all of the houses, fixed a few errors and tweaked the textures. A few drips here and a few decorations there. Nothing serious, only a slight touch.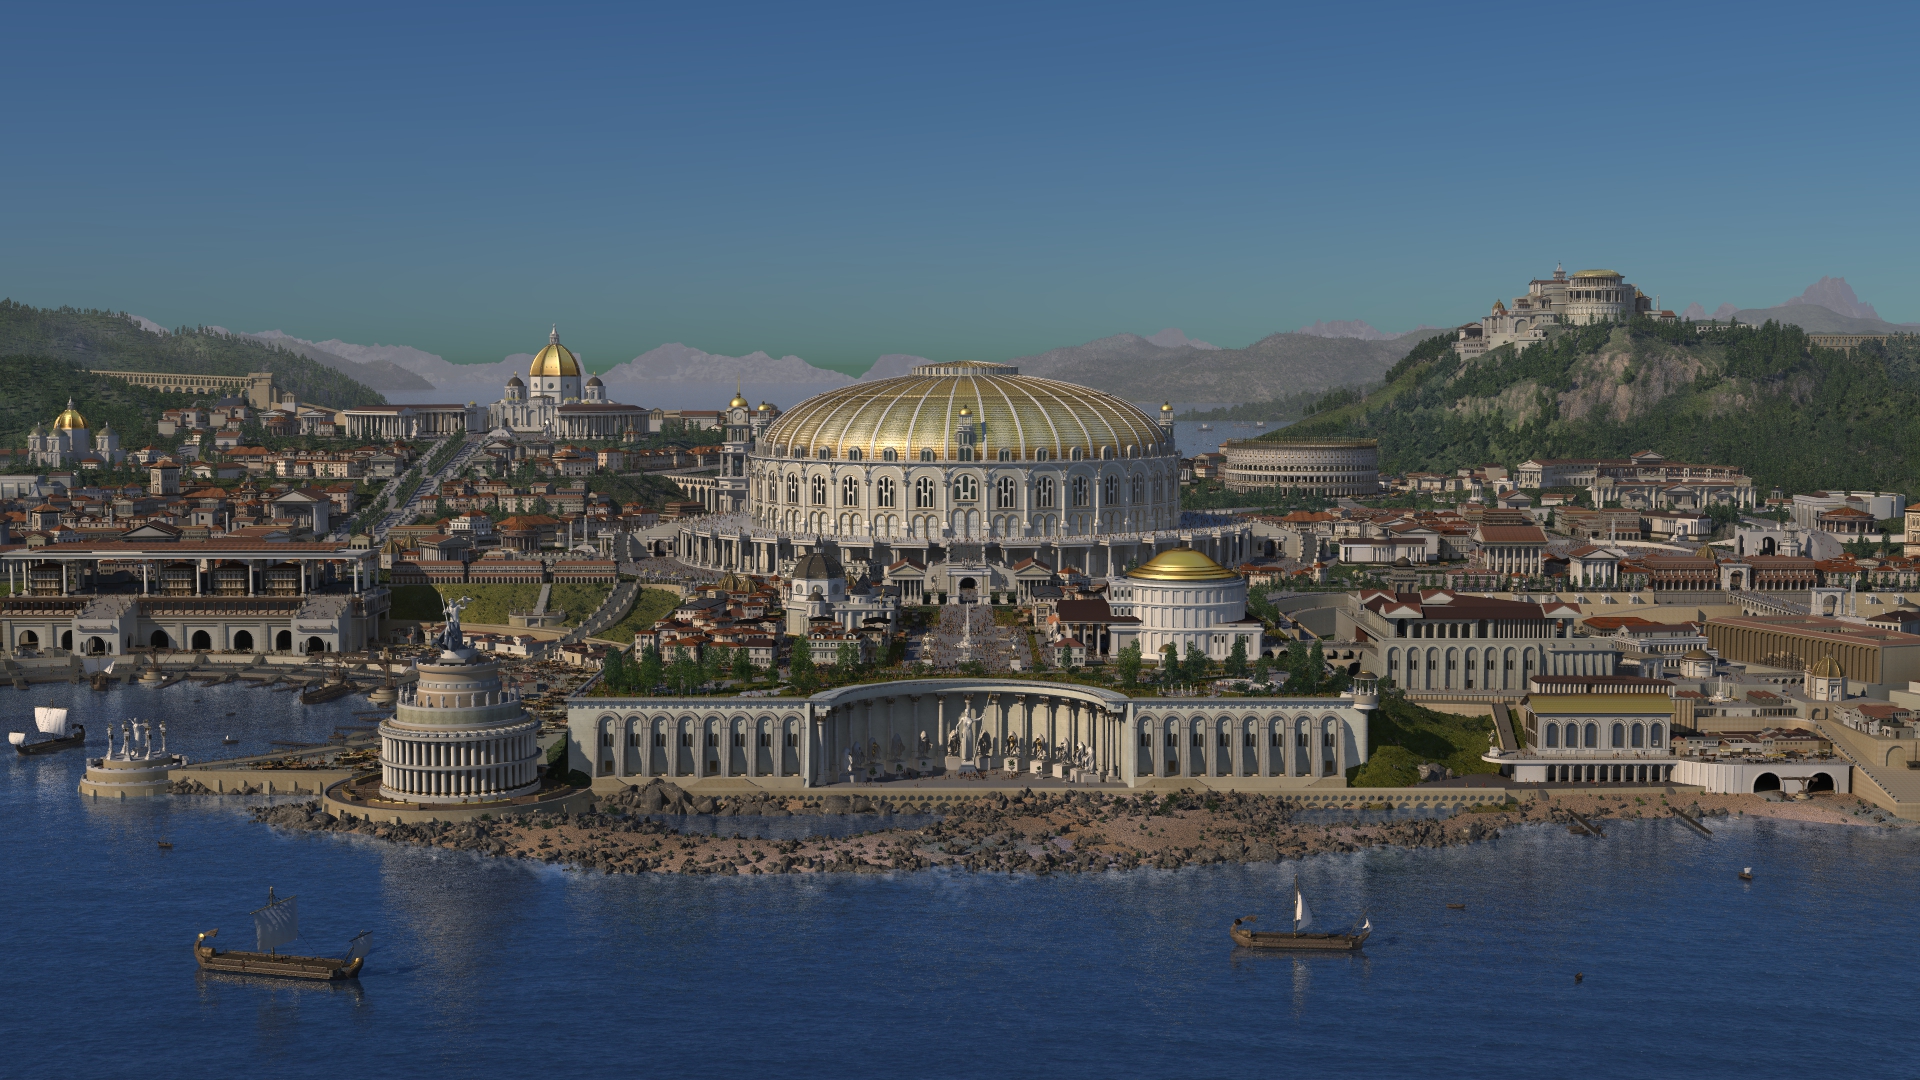
Eventually i replaced the mountains with better ones. To be honest i was thinking about real sky, but i don't know, it was way too simple. And because of David's ( Director, role model and Friend :) ) influence, i wasn't afraid to move towards a more colorful and magical sky. And there it was, a nice sky that i loooooved.
Besides that i turned on the real fog, and DP's atmospherics. You can check out the settings.
This was the moment when i felt, this is the angle, this is what i need, so i stopped the camera movement (clearly visible in the animation). when i reached this point i decided to create a final GI cache. ( only a couple of refinements left and the rendertime was long enough :D )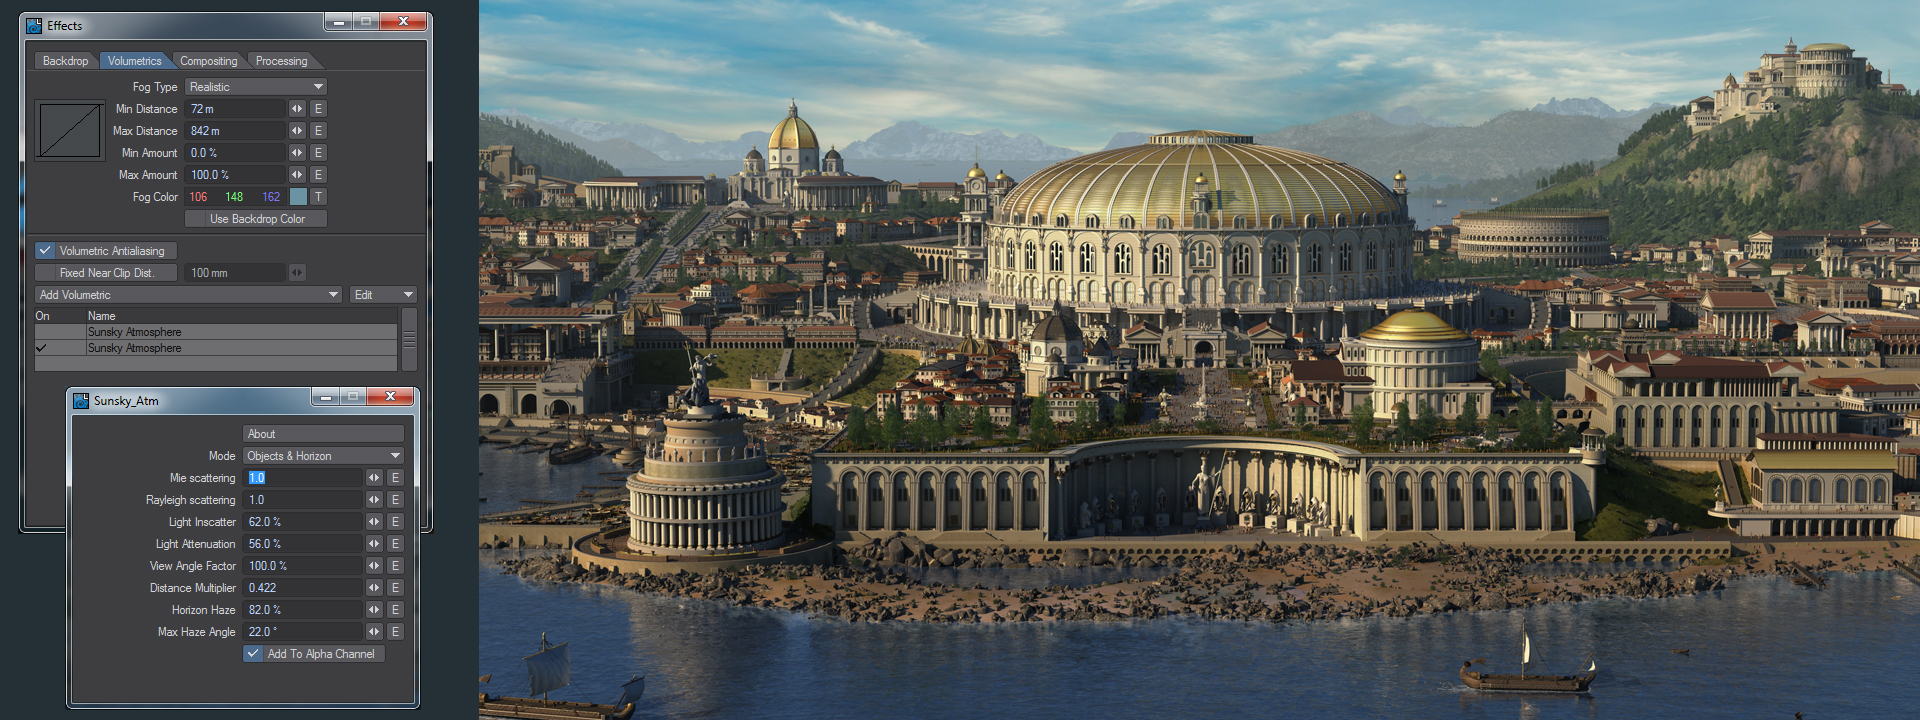
Just because... the radiosity buffer.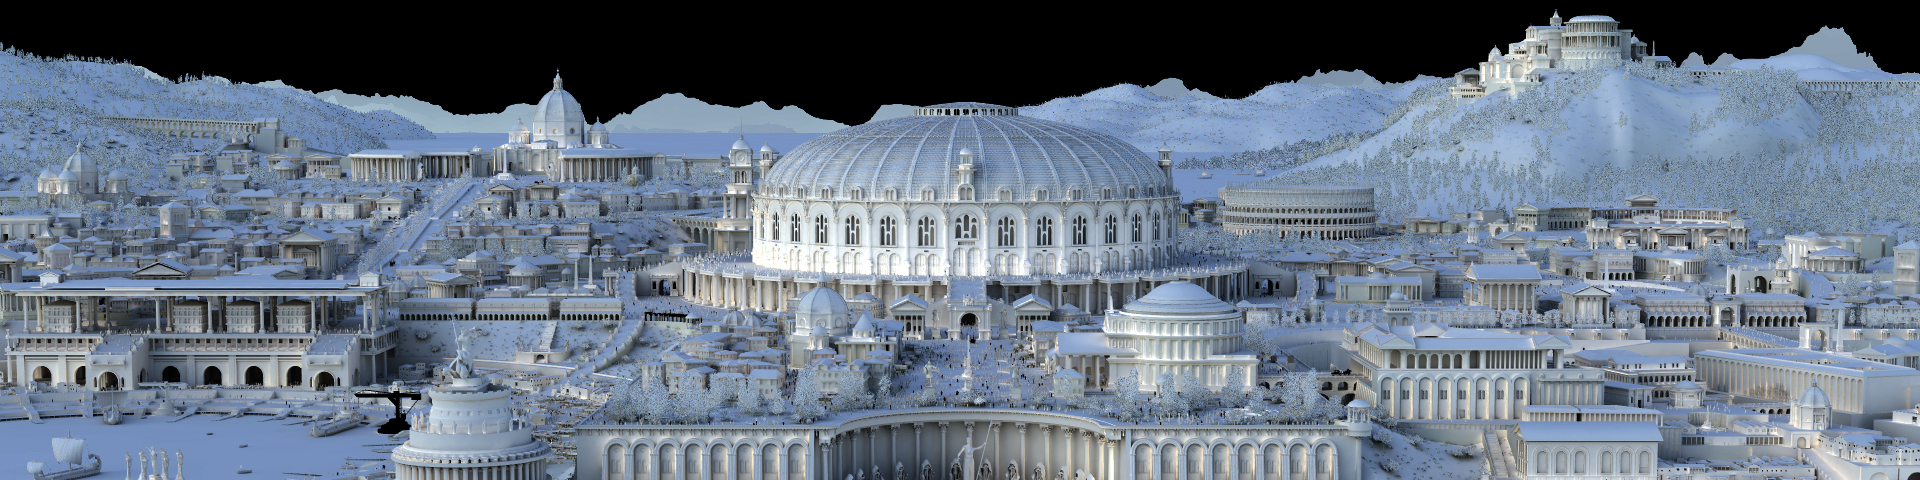
Before the final-final-final refinements, i rendered out a depth map ( the depth buffer came out badly, i ran out of ram, so it became a big grey line-mess :/ ) I never used it tho... :D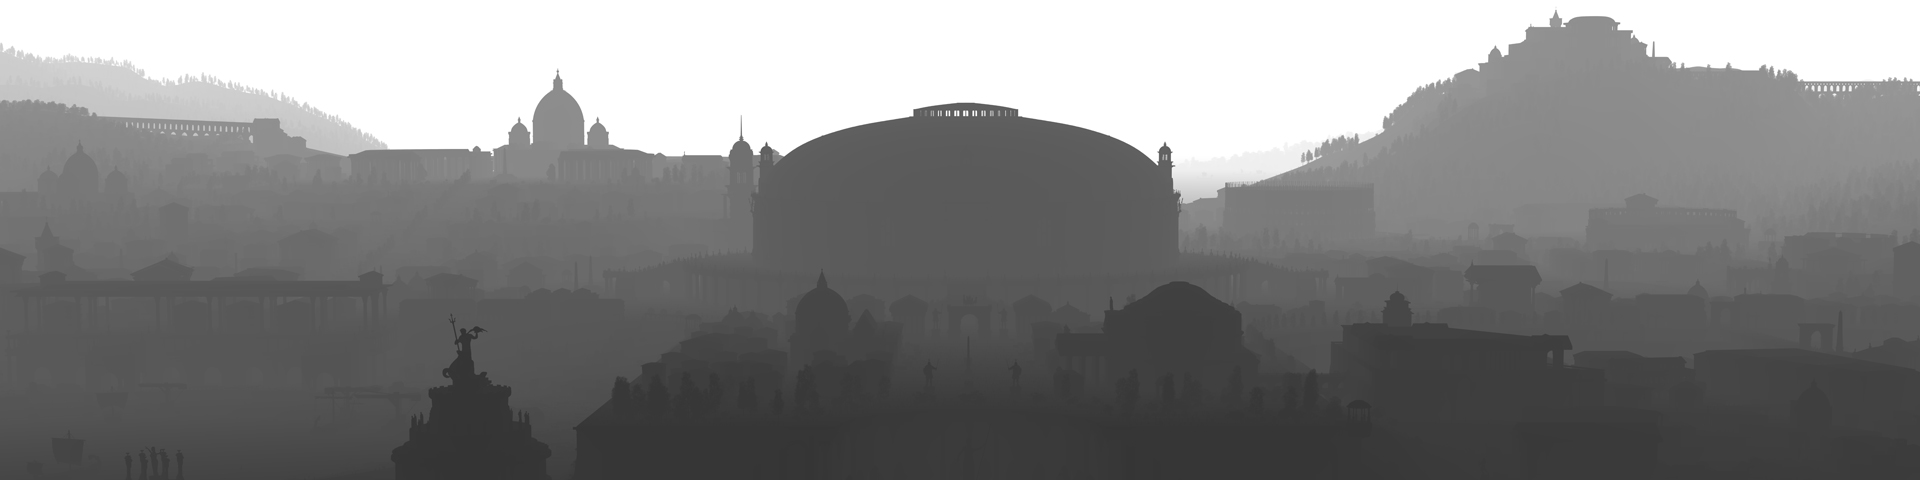
And the occlusion map, now this was useful to get the extra details, it is not so obvious in HD, but clearly visible in the original image. I used Cageman's quick and dirty method ;)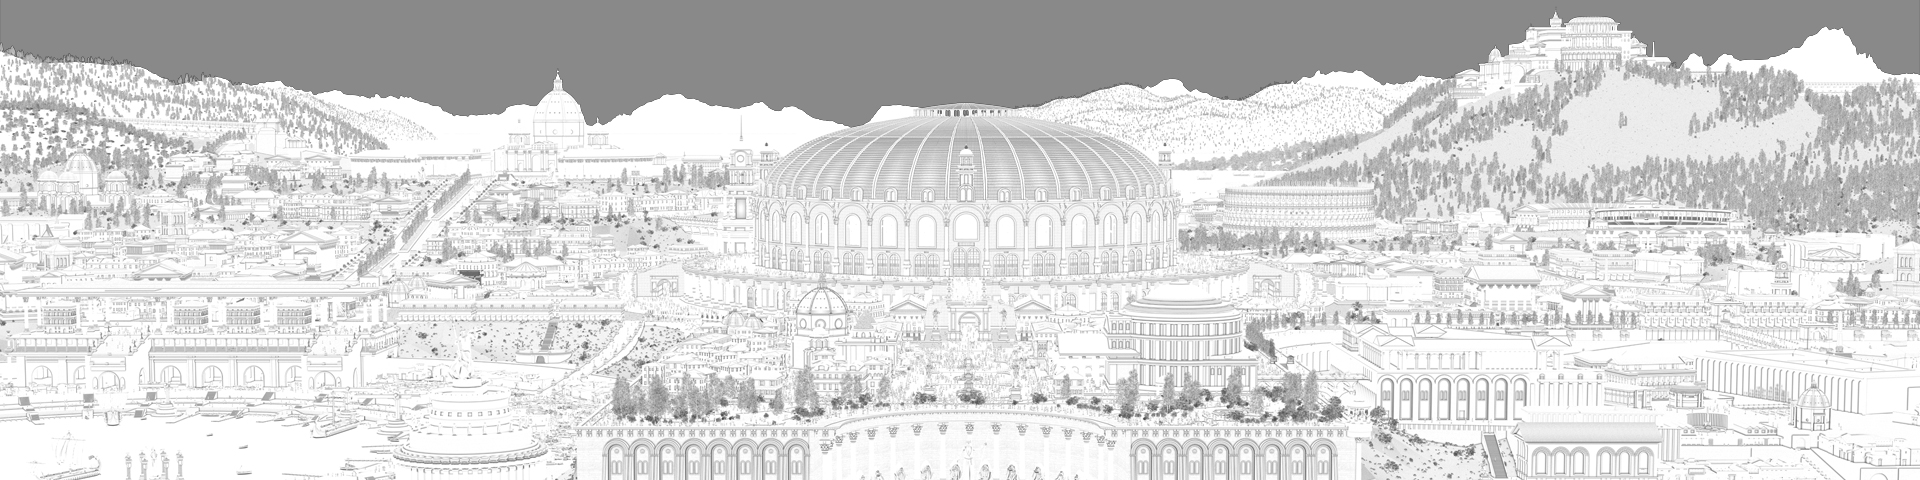
And grab your seats, all of the instances: ON. :D 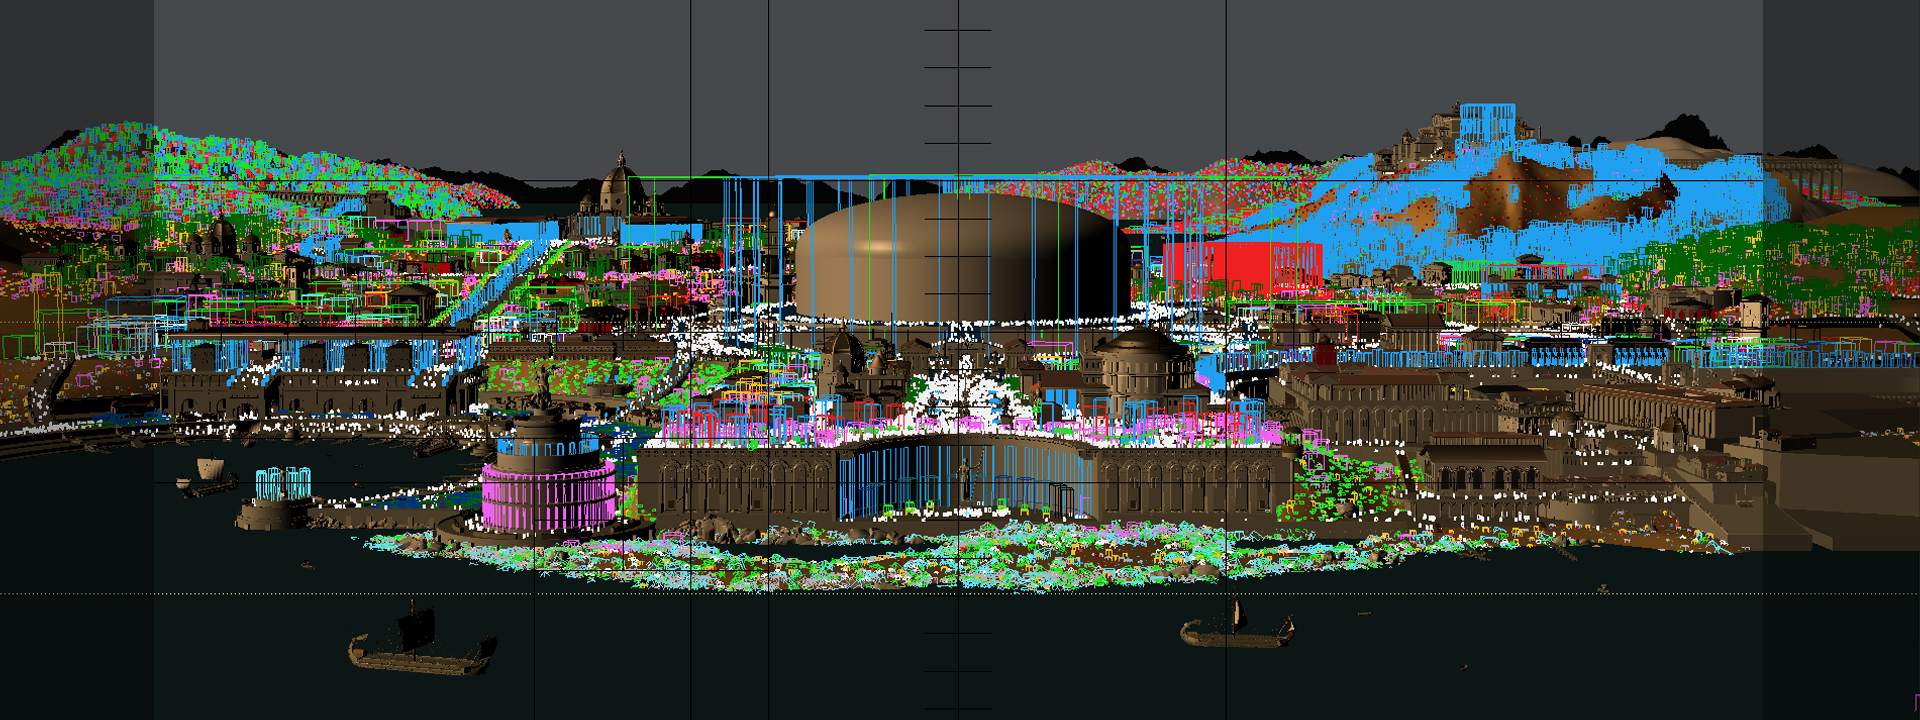
The whole stuff took a month to create, the basic modeling was fast ( in a couple of days), but refining it and creating the textures took 3 weeks. Of course besides my daily work in my freetime, but i spent at least 2...3...4 hours per day... gosh Roxy "loved" that.. sooorrrrrryyyy honey <3
A small statistics:
And the final-final-final-final tweaks, saturation ( I've underscored the saturation.. hhahaha sorry, this was the geek sentence of my wedding by my friend, so i must use this everytime i can :D )
So a little color and tone tweaking and tadaaaammmmm ready :)
The beautyful progress video: "the making of Cavius Maximus"
Final words:
Future plans: i'll create a 360° VR animation in 4K ( this willl be FUN)
Thanks to my loving Wife who can handle my maniac creativity day by day :)
To David, who opened up my mind in a lot of ways :)
To Petey, Hungy and Gabcsi, whom allowed me to bomb them constantly with the work in progress images. And for their suggestions too :)
And extra special thanx to my cousin Comet, for the music; check out his tunes:)
And thanx to my little poopingfactories, for keeping me happy all day and all night <3
Well, that's it. Sorry for the grammar nonsense; i am tired as hell :D
Peace out Wavers!
ekho
Ajánlott bejegyzések:


A bejegyzés trackback címe:
Kommentek:
A hozzászólások a vonatkozó jogszabályok értelmében felhasználói tartalomnak minősülnek, értük a szolgáltatás technikai üzemeltetője semmilyen felelősséget nem vállal, azokat nem ellenőrzi. Kifogás esetén forduljon a blog szerkesztőjéhez. Részletek a Felhasználási feltételekben és az adatvédelmi tájékoztatóban.